Getting Started
You can quickly add real-time chat functionality to your Unity project using the Unity SDK. This guide will walk you through each step—from installing the Chat SDK, sending your first message, to checking messages in the console.
Jump right in with the Example project provided by BACKND! It includes a ready-made UI and working real-time chat so you can see it in action and easily use just the parts you need.
1. Install Chat SDK
Download the package below and import it into your Unity project.
- BackndChat-1.3.0.unitypackage [2024-10-29]
When importing the Chat SDK, make sure to uncheck Backend.dll to avoid overwriting it. For more information, check out the When also using Base SDK document.
2. Set up authentication key
- Go to Chat > Settings page in BACKND Console and copy
Chat UUID,Client App ID,andSignature Key.
- Paste the keys into Unity.
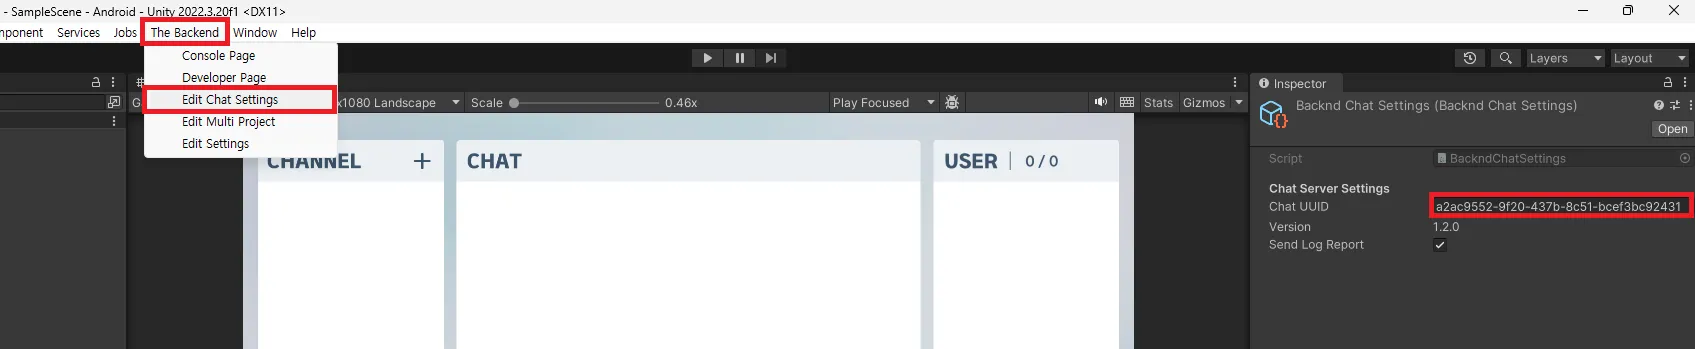
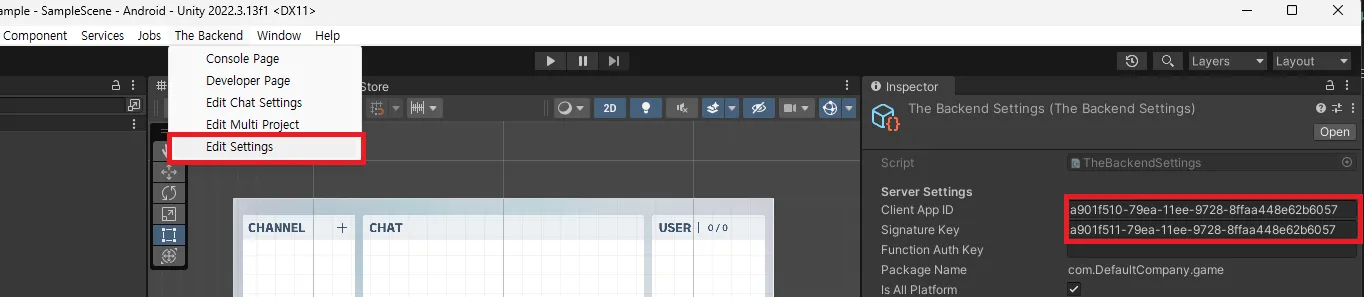
- Enter Chat UUID in
The Backend > Edit Chat Settings - Enter Client App ID / Signature Key in
The Backend > Edit Settings
3. Set user nickname
User nickname must be set to use the chatting function.
using UnityEngine;
using BackEnd;

public class BackendInit : MonoBehaviour
{
    void Start()
    {
        // BACKND initialization
        Backend.Initialize();

        var result = Backend.BMember.CustomLogin("testId", "testPw");
        if (!result.IsSuccess())
        {
            Backend.BMember.CustomSignUp("testId", "testPw");
            // Set nickname
            Backend.BMember.UpdateNickname("Nickname");
        }
    }
}
4. Initialize chat client
Initialize ChatClient to exchange chat messages.
using System.Collections.Generic;
using UnityEngine;
using BackndChat;

public class UIChatExample : MonoBehaviour, BackndChat.IChatClientListener
{
    private ChatClient ChatClient;

    void Start()
    {
        ChatClient = new ChatClient(this, new ChatClientArguments
        {
            Avatar = "default",
            Metadata = new Dictionary<string, string>()
            {
                { "Rank", "1" },
                { "Level", "1000" },
                { "Server", "1" }
            }
        });
    }

    void Update() => ChatClient?.Update();
    void OnApplicationQuit() => ChatClient?.Dispose();

    public void OnChatMessage(MessageInfo messageInfo)
    {
        Debug.Log($”[Send] {messageInfo.GamerName}: {messageInfo.Message}");
    }

    public void OnSuccess(SUCCESS_MESSAGE success, object param) { }
    public void OnError(ERROR_MESSAGE error, object param) { }
}
The BACKND Chat SDK includes built-in automatic reconnection, even during network changes or temporary disconnections. Once you initialize the ChatClient, you only need to call Dispose() when terminating it; you do not need to implement any separate reconnection logic.
5. Send message
Send a message to the channel.
When BACKND Chat is activated, a channel named server-1 under the global group is automatically created. Try sending a message to that channel.
// Flow for joining a channel and sending a message

void Start()
{
    ChatClient = new ChatClient(this, new ChatClientArguments
    {
        // ...
    });

    // Join the default channel (automatically created in the console)
    ChatClient.SendJoinOpenChannel("global", "server-1");
}

public void OnJoinChannel(ChannelInfo channelInfo)
{
    // Once joined, send a message
    ChatClient.SendChatMessage(channelInfo.ChannelGroup, channelInfo.ChannelName, channelInfo.ChannelNumber, Hello!");
}
Complete code template
BACKND initialization script
using BackEnd;
using UnityEngine;

public class LoginManager : MonoBehaviour
{
    public InputField Username = null;

    public InputField Password = null;

    void Start()
    {
        Backend.Initialize(true);
    }

    void Login()
    {
        var returnObject = Backend.BMember.CustomLogin(Username.text, Password.text);
        if (false == returnObject.IsSuccess())
        {
            Debug.Log("CustomLogin Fail");

            returnObject = Backend.BMember.CustomSignUp(Username.text, Password.text);
            if (false == returnObject.IsSuccess())
            {
                Debug.Log("CustomSignUp Fail");
                return;
            }

            returnObject = Backend.BMember.CustomLogin(Username.text, Password.text);
            if (false == returnObject.IsSuccess())
            {
                Debug.Log("CustomLogin Fail");
                return;
            }

            // Nickname update - You cannot connect to the chat if you do not have a nickname.
            Backend.BMember.UpdateNickname(Username.text);
        }
    }
}
Chat initialization script
public class UIChatManager : MonoBehaviour, BackndChat.IChatClientListener
{
    private BackndChat.ChatClient ChatClient = null;

    void Start()
    {
        ChatClient = new ChatClient(this, new ChatClientArguments
        {
            Avatar = "default",
            Metadata = new Dictionary<string, string>()
            {
                { "Rank", "1" },
                { "Level", "1000" },
                { "Server", "Server 1" },
            },
        });

        // If the inspector has not been configured, you can register the Chat UUID (xxxx-xxxx-xxxxxx-xxxxxxx) manually as shown below.
        /*
            ChatClient = new ChatClient(this, new ChatClientArguments
            {
                UUID = "xxxx-xxxx-xxxxxx-xxxxxxx",
                Avatar = "default",
                Metadata = new Dictionary<string, string>()
                {
                    { "Rank", "1" },
                    { "Level", "1000" },
                    { "Server", "Server 1" },
                },
            });
        */

        // If using a custom authentication server, the token can be registered as shown below.
        /*
            ChatClient = new ChatClient(this, new ChatClientArguments
            {
                UUID = "xxxx-xxxx-xxxxxx-xxxxxxx",
                Avatar = "default",
                Metadata = new Dictionary<string, string>()
                {
                    { "Rank", "1" },
                    { "Level", "1000" },
                    { "Server", "Server 1" },
                },
                CustomAccessToken = USER_TOKEN,
            });
        */
    }

    void Update()
    {
        ChatClient?.Update();
    }

    public void OnJoinChannel(ChannelInfo channelInfo) { }

    public void OnLeaveChannel(ChannelInfo channelInfo) { }

    public void OnJoinChannelPlayer(string channelGroup, string channelName, UInt64 channelNumber, PlayerInfo player) { }

    public void OnLeaveChannelPlayer(string channelGroup, string channelName, UInt64 channelNumber, PlayerInfo player) { }

    public void OnUpdatePlayerInfo(string channelGroup, string channelName, ulong channelNumber, PlayerInfo player) { }

    public void OnChangeGamerName(string oldGamerName, string newGamerName) { }

    public void OnChatMessage(MessageInfo messageInfo) { }

    public void OnWhisperMessage(WhisperMessageInfo messageInfo) { }

    public void OnTranslateMessage(List<MessageInfo> messages) { }

    public void OnHideMessage(MessageInfo messageInfo) { }

    public void OnDeleteMessage(MessageInfo messageInfo) { }

    public void OnSuccess(SUCCESS_MESSAGE success, object param)
    {
        switch(success)
        {
            default:
                break;
        }
    }

    public void OnError(ERROR_MESSAGE error, object param)
    {
        switch(error)
        {
            default:
                break;
        }
    }

    private void OnApplicationQuit()
    {
        ChatClient?.Dispose();
    }
}
6. Check the message in the console
Select the server-1 channel in the BACKND console to view the chat messages sent from the client.
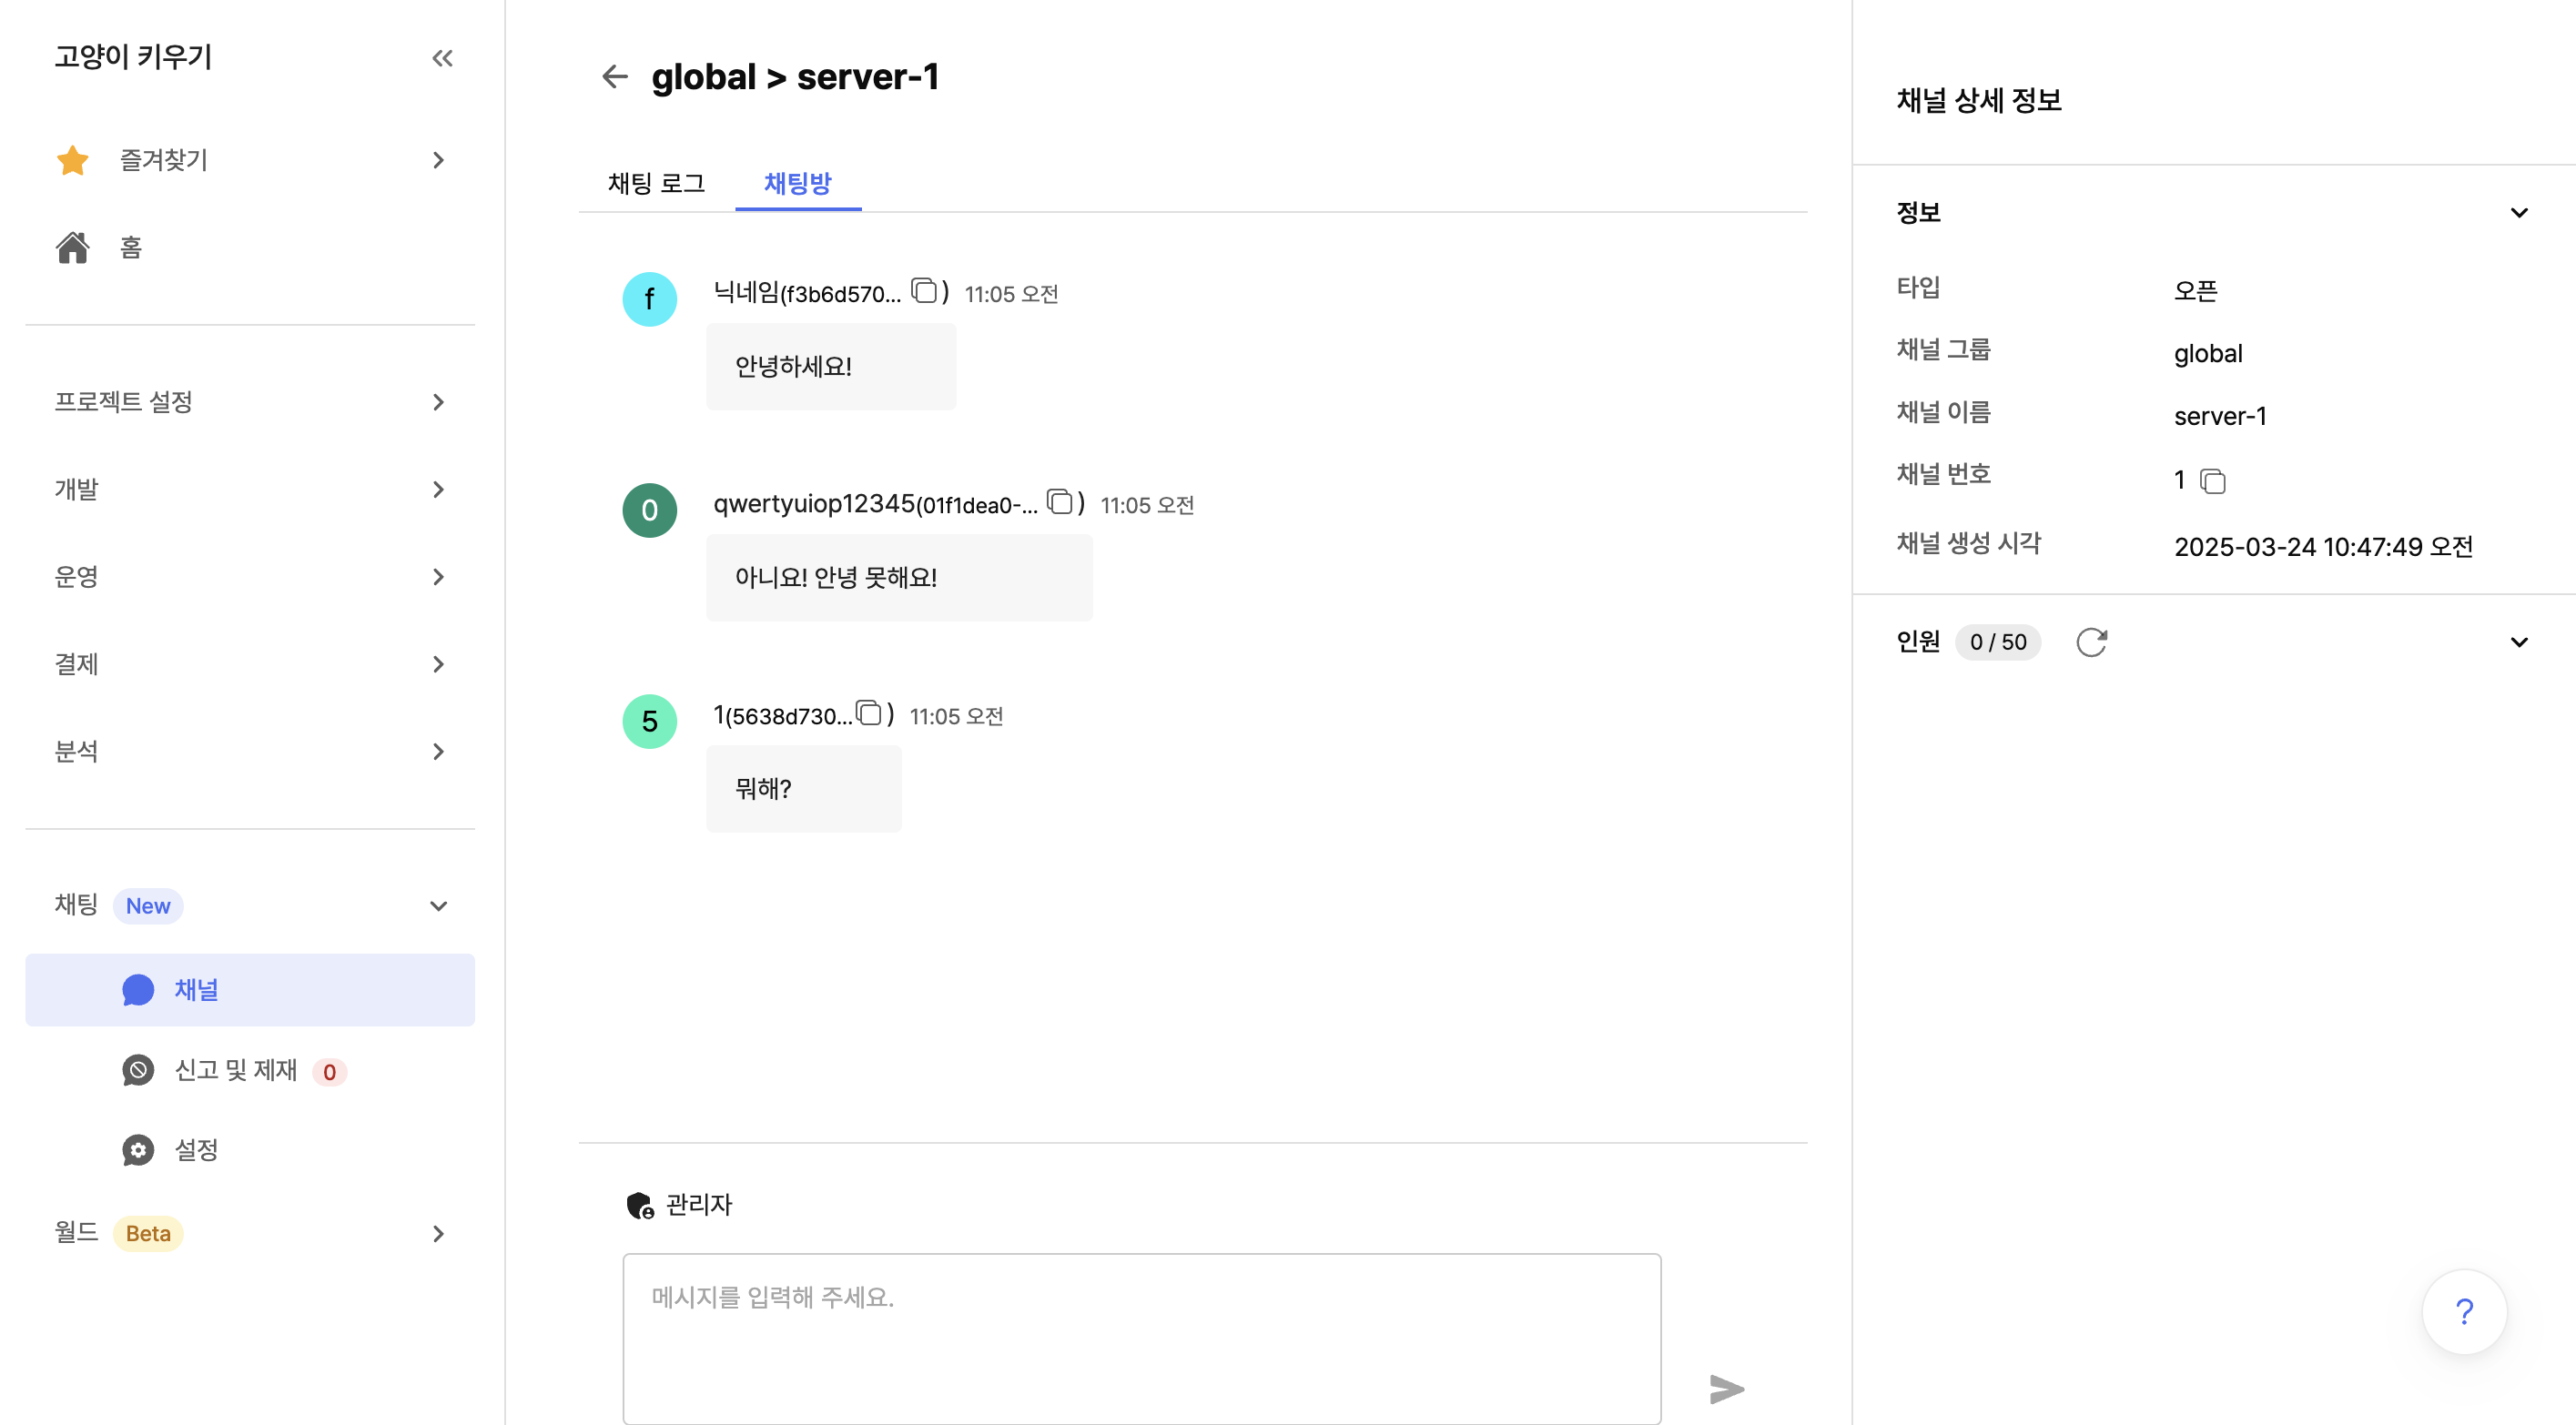
Chat integration is now complete! 🎉
You can now use the real-time chat function in your game.
To expand the feature or apply it to your actual project, check out the resources below.
- I want to see the sample with complete GUI → Example project
- I'm curious about other chat functions → Introduction to chat functions
- I want to use it with BACKND Base → Base integration guide
- I want to use my own auth system → Custom authentication guide