Google Play Store
The process does not cause problems in ordinary situations; however, during the use of the receipt verification function, the in-app purchase fails until the store information changes according to the changed developer account information.
You must abide by the follow instructions before transferring the game.
- Temporarily disable the receipt verification function and proceed with update
- Transfer the game between developer accounts
- Update BACKND Console's store information with the receiving developer account.
- Activate receipt verification function and proceed with update
Enter Google Play information
The following information is required to provide the receipt verification feature function and statistics related to revenue on the dashboard.
You can use BACKND Console's receipt verification function and revenue-related statistics on the dashboard after entering the information.
This information can be obtained from Google Play Console.
The following files and information must be obtained via the steps below.
- JWT(JSON web token) JSON file
- Report storage bucket URL
- Check if Server Settings > Authentication Information > Android Package Name is entered correctly in BACKND Console.
- Check the permission settings of the JWT token.
- After the JWT is created, it will be registered after a day has passed.
- Make sure that you have set the bucket URL correctly.
- If the bucket URL does not exist, you can check the URL after generating a payment report through an actual payment.
Get the JWT(JSON web token) JSON file
Follow the steps below to generate a JWT.
- Access Google Cloud Platform
- Generate a project for accessing Google Play in Google Cloud Platform
- In the left menu of the Google console, go to Settings > Developer account > API Access > select the project to be linked.
- Grant access to the service account
- Grant (or modify) access to the service account created above.
1) Create a Google API access project
Access Google Cloud Platform.
2. Create a Google service account
Click the project name at the top left to open the project list.
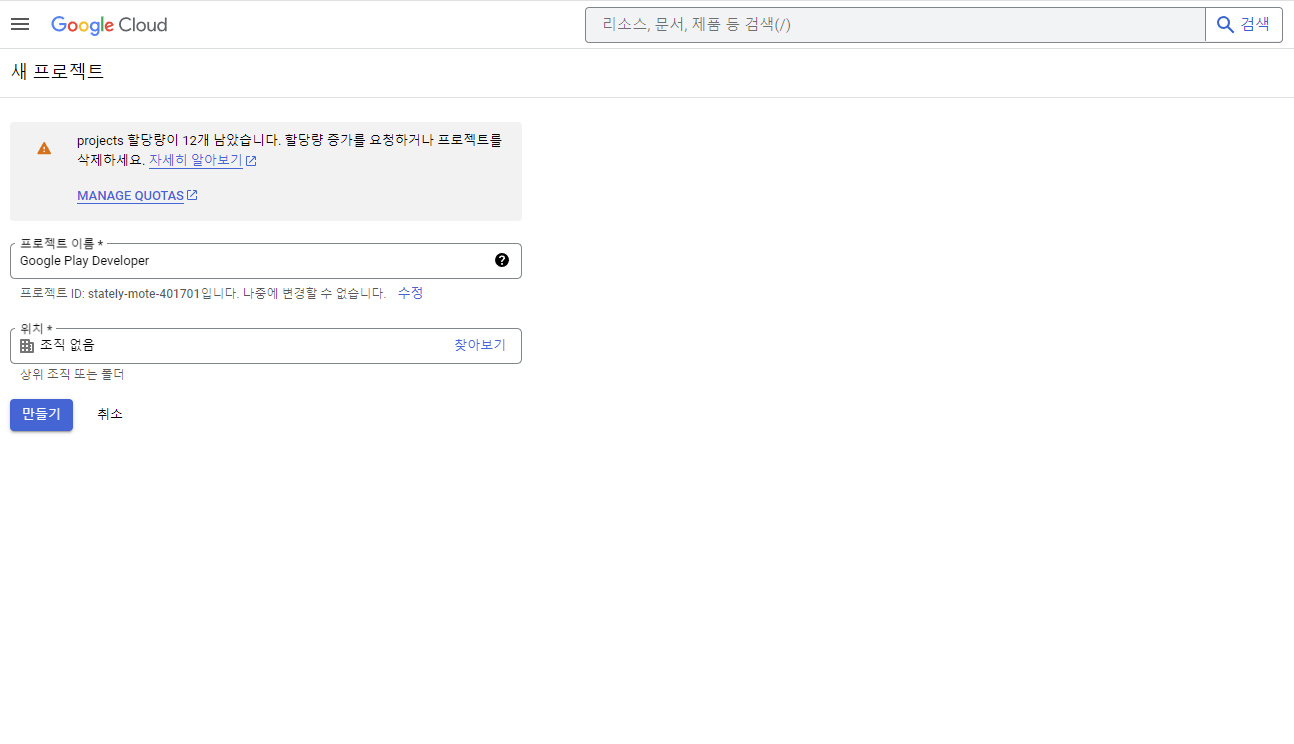
Select Create new project.
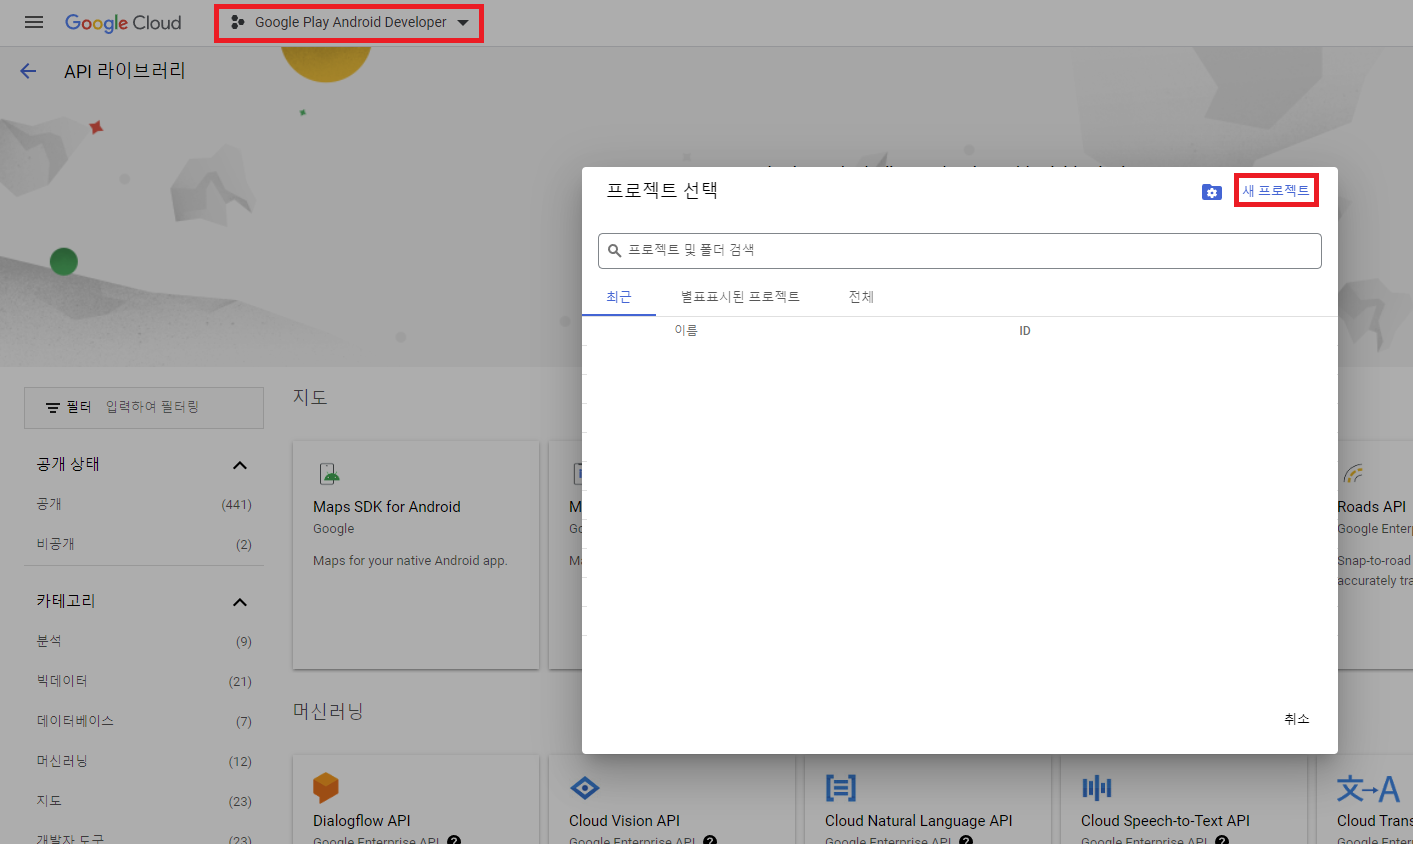
Set the project name.
3. Create a JWT
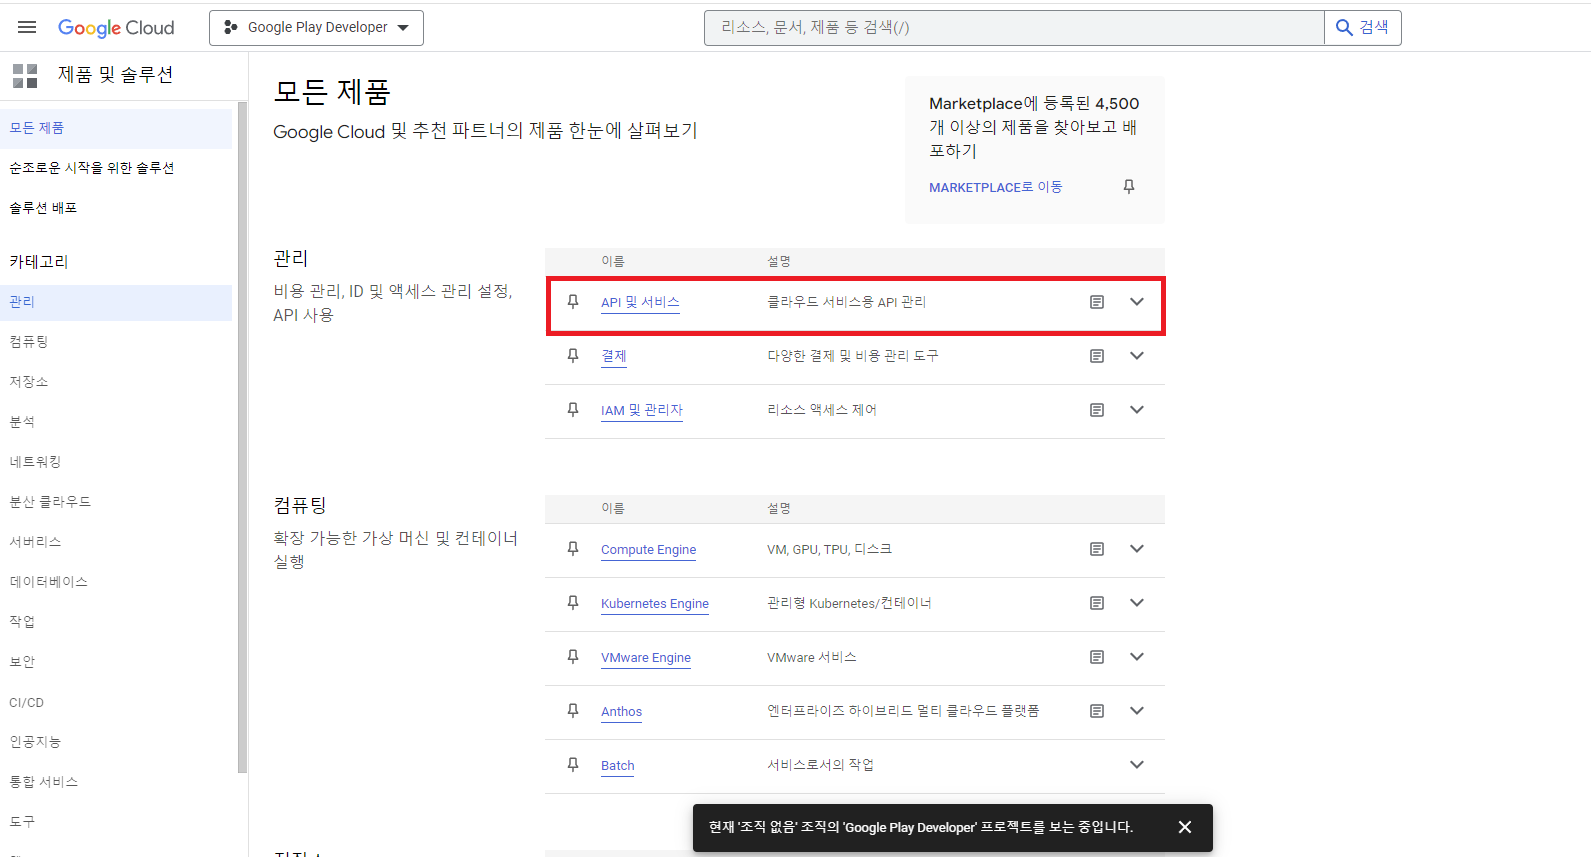
Once the project is created, use the search menu on the left sidebar to click APIs & Services > Enabled APIs & Services.
Or, click APIs & Services from all products.
Click +APIs & Services Use Settings at the top.

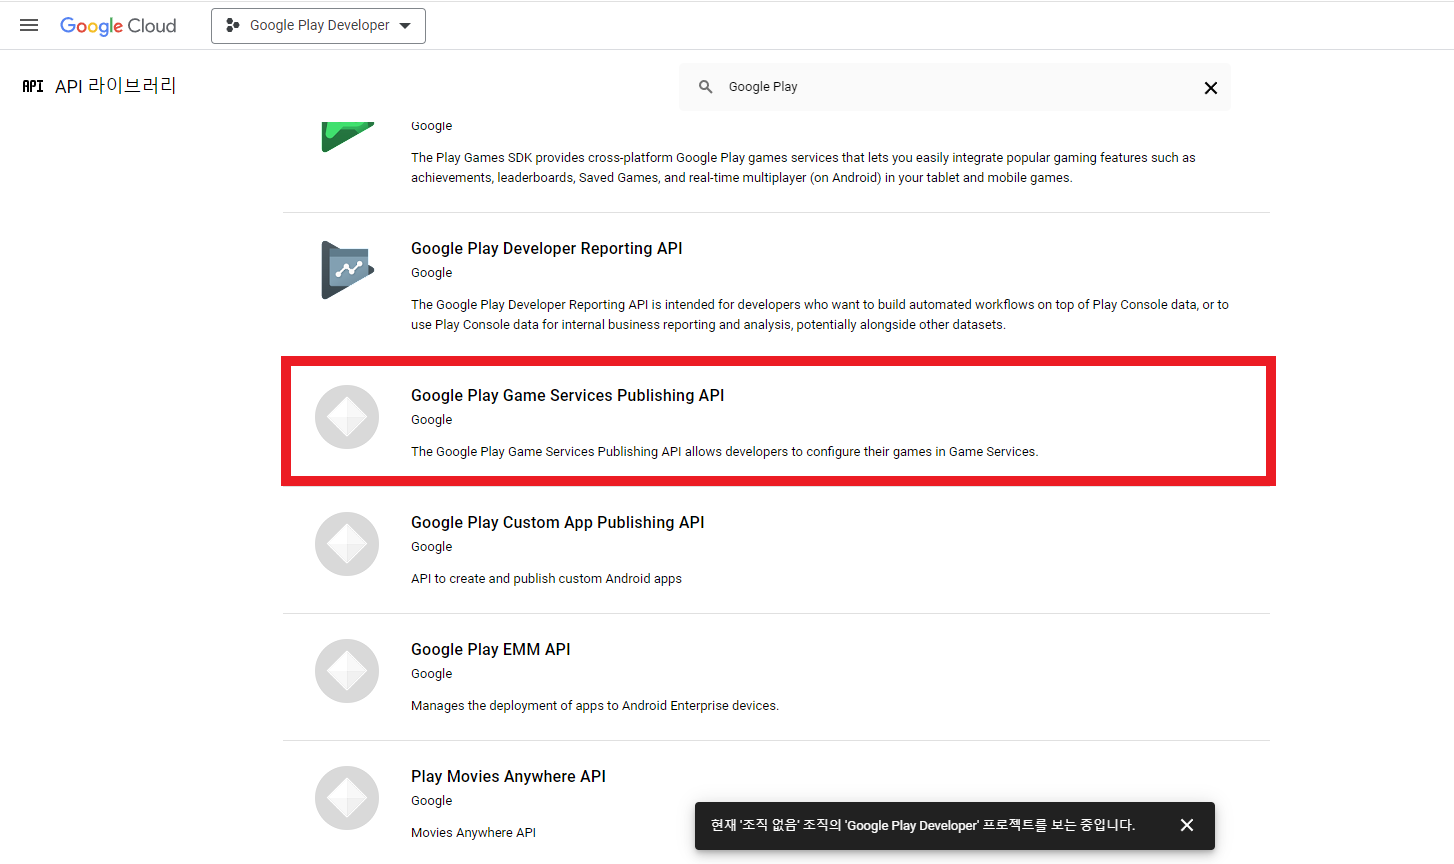
A total of 2 APIs must be added.
- Click Google Console > Settings > API access > Grant access for the created service account.
- Google Play Game Services Publishing API
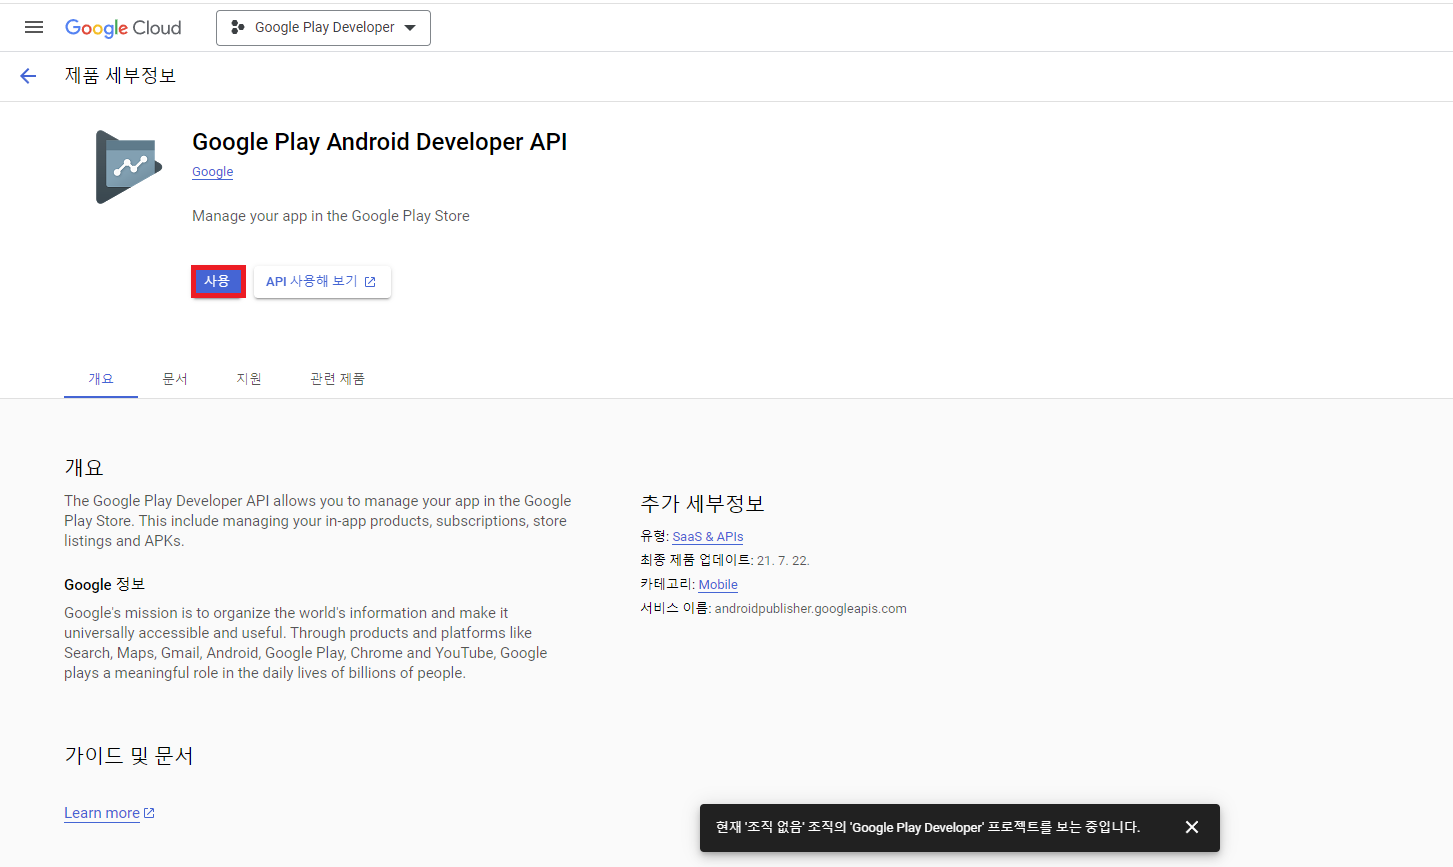
Search for Google Play on the search bar, then click Google Play Android Developer API to Enable it.
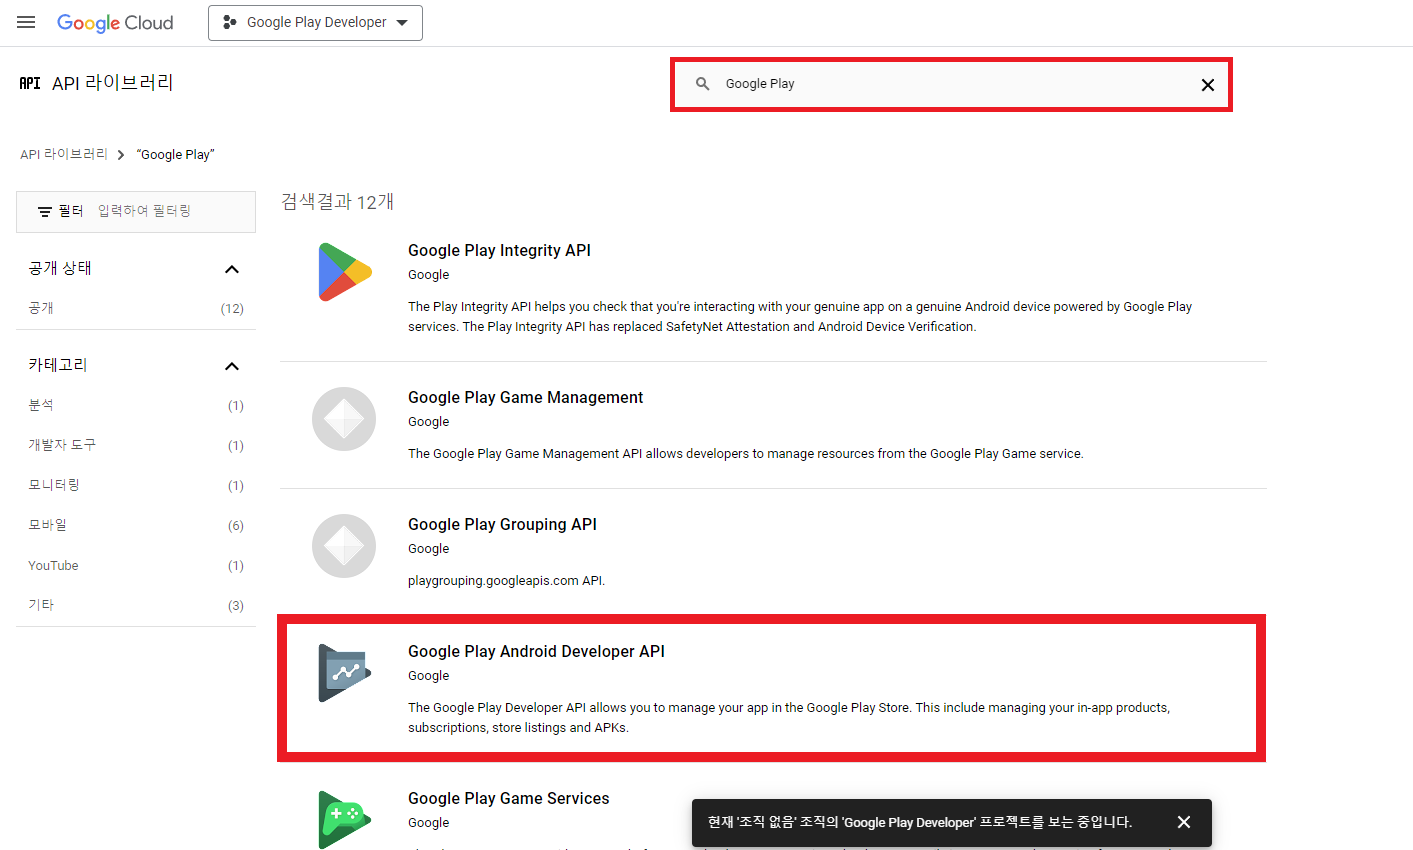
Also, Enable Google Play Game Services Publishing API.
Simply click on the button.
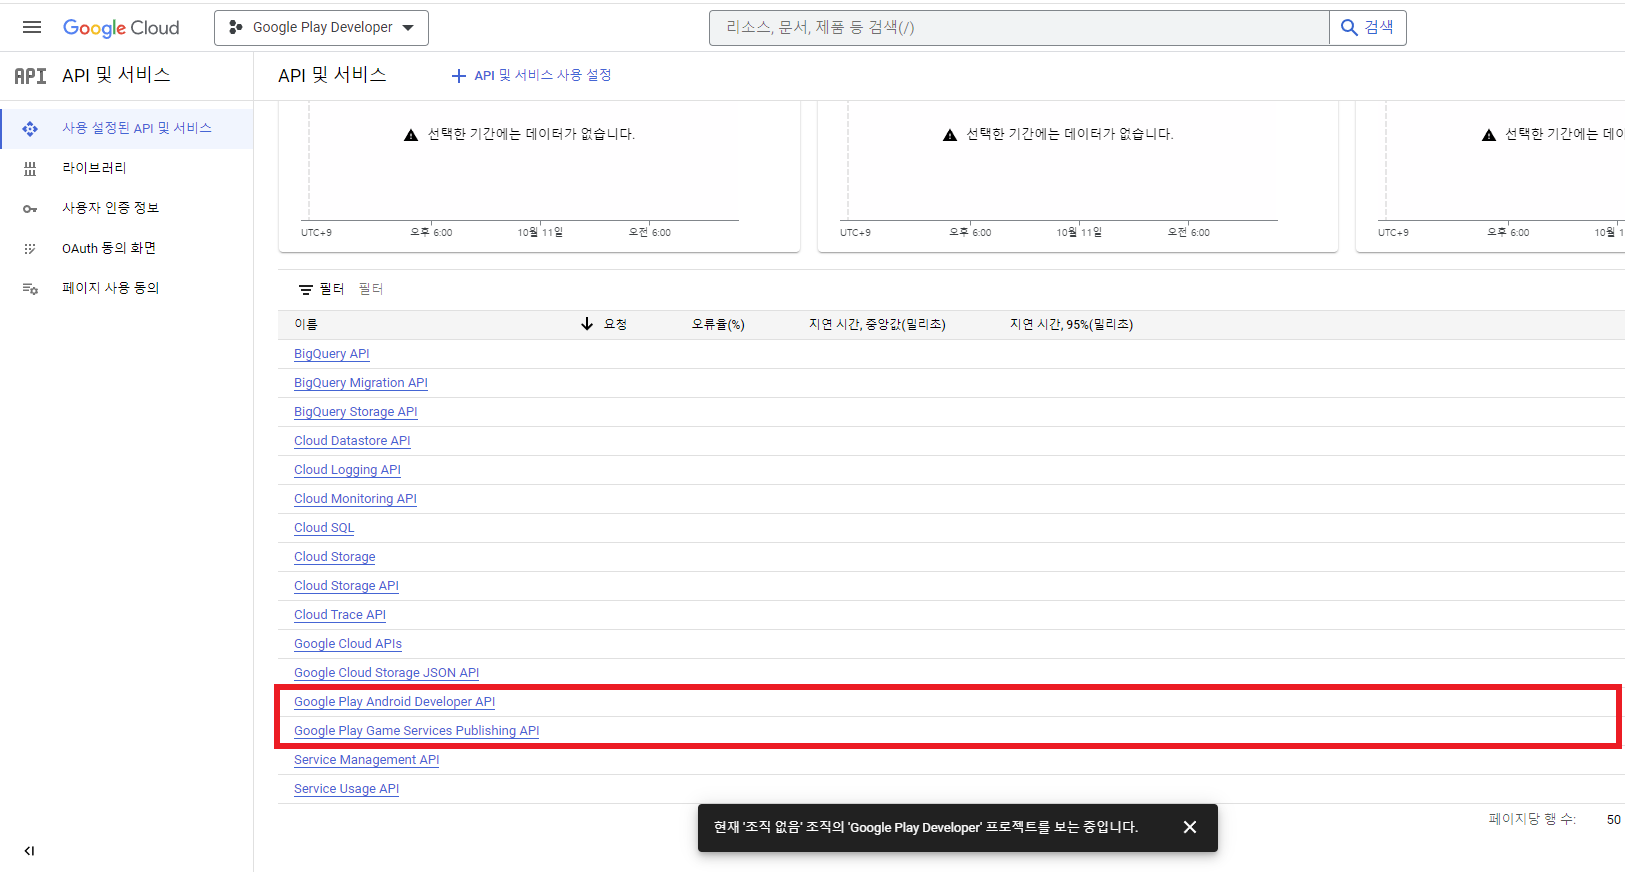
Once they are added, Google Play Android Developer API and Google Play Game Services Publishing API should appear in the list.
Once both APIs have been added, the project creation for accessing Google Play is complete.
4. Grant access to the service account
Go to Credentials in the sidebar menu.
- After connecting to the Google Cloud Platform, click + Create Service Account.
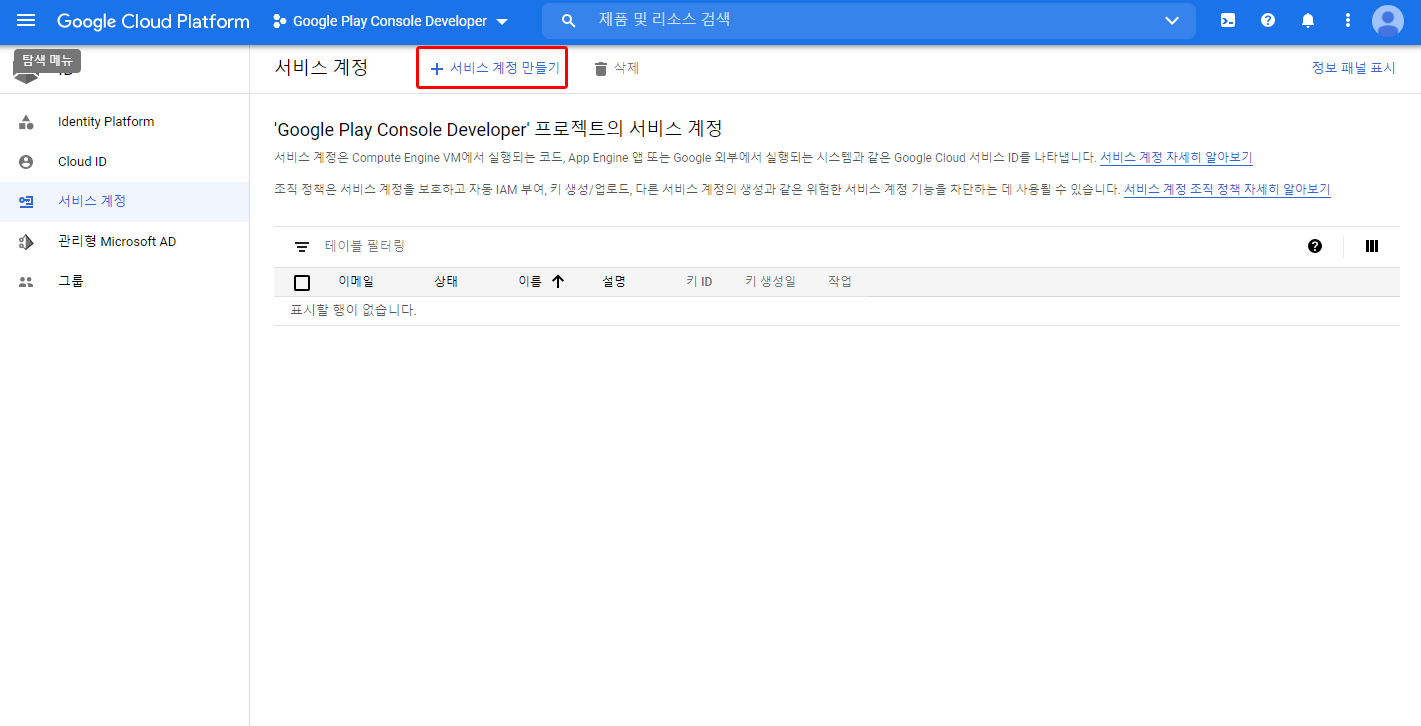
- Enter the service account name, ID, and description and click Create.
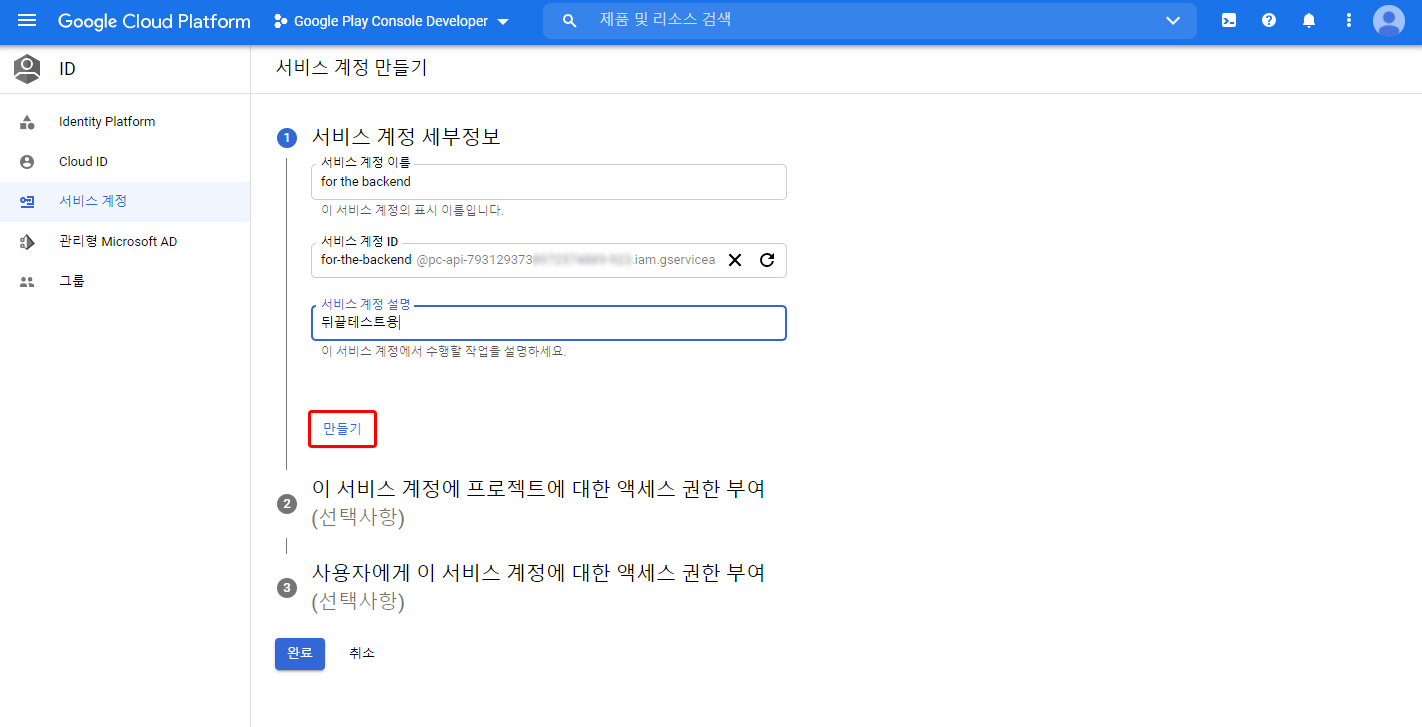
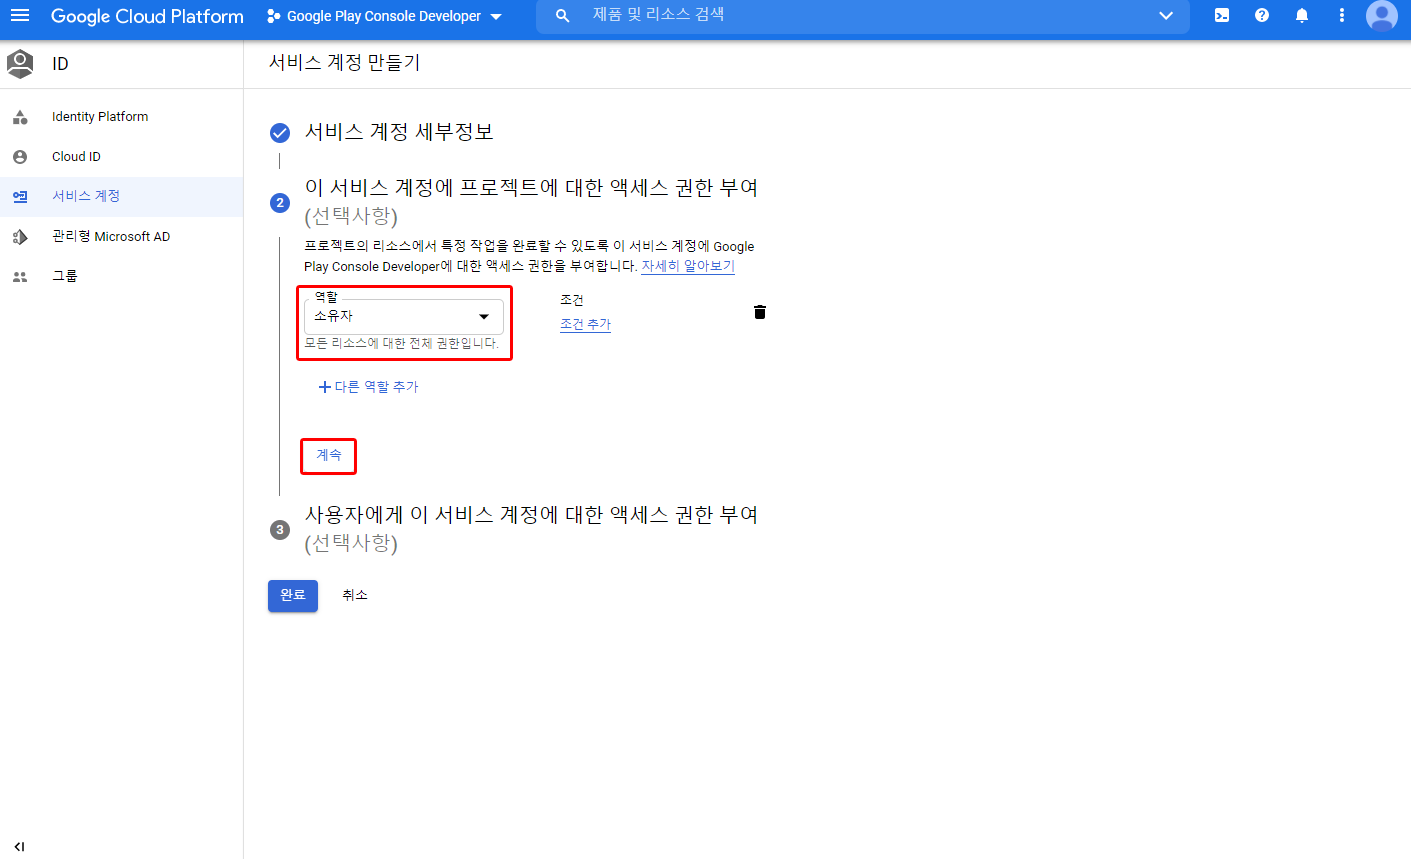
- Select Owner for the Role and click Continue.
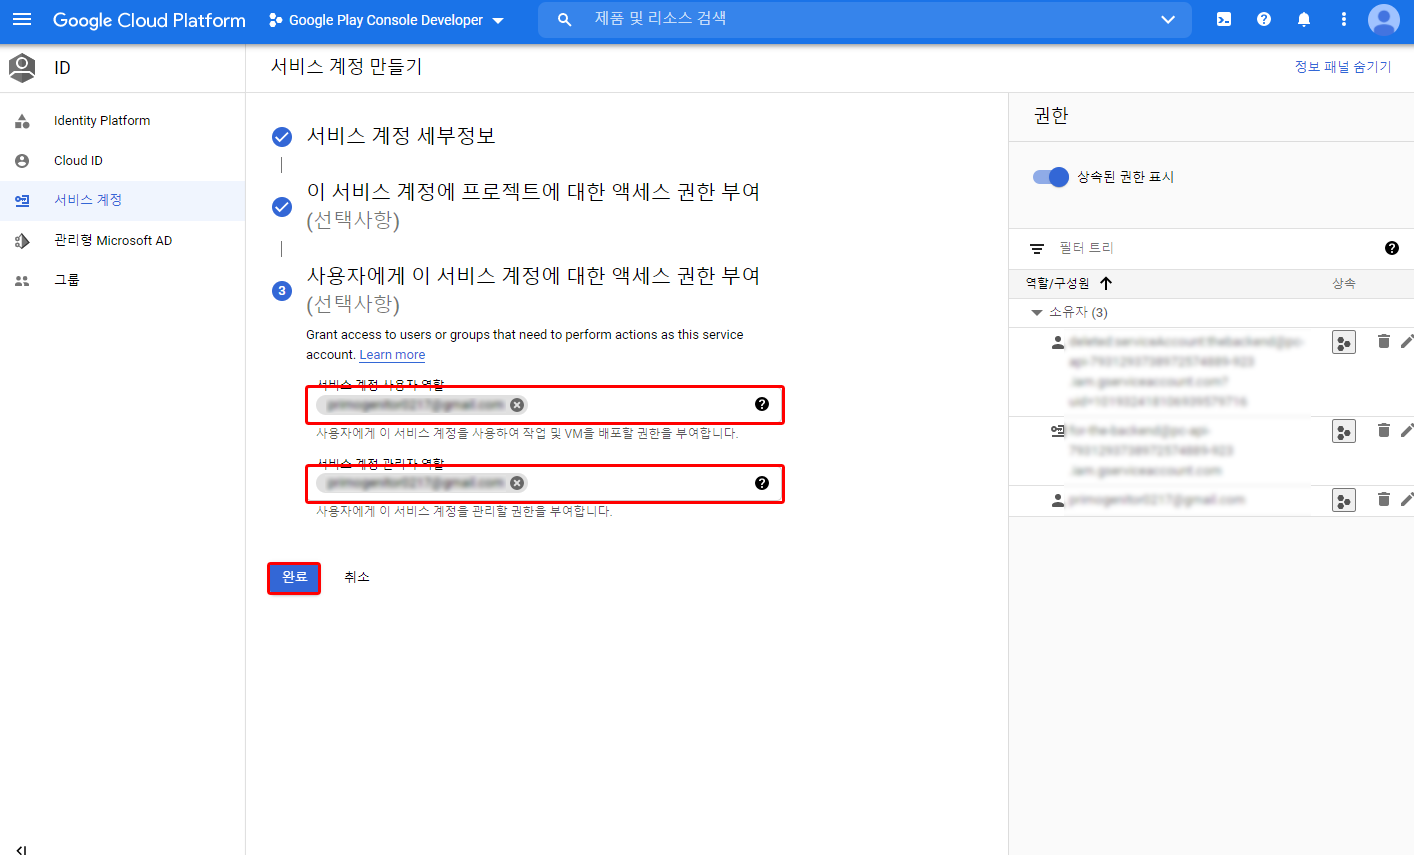
Enter the email address currently connected to the Google console as the service account user role. Then, click Done.
(If not entered, the service account may not appear in Google Console - API Access.) )
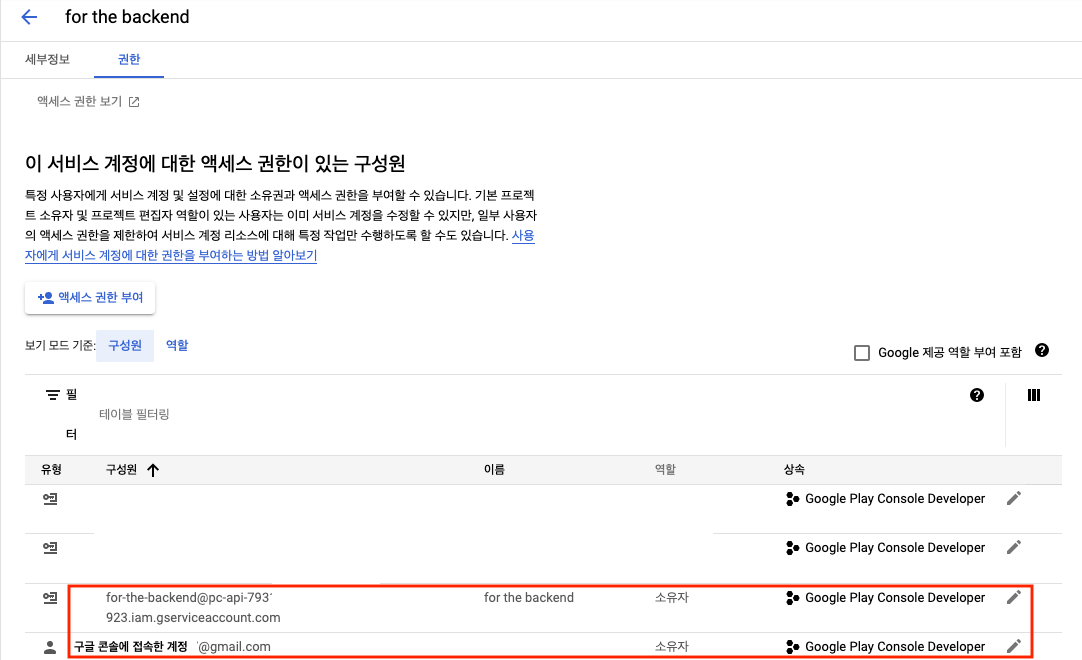
- You can check the permissions of the service account by clicking the service account and the Permissions tab. Please make sure that both accounts are registered as owners.
5. Create a JWT
Create a key consisting of a JSON in the created service account.
- Click the created service account, click Details > Keys > Add Key and click Create new key.
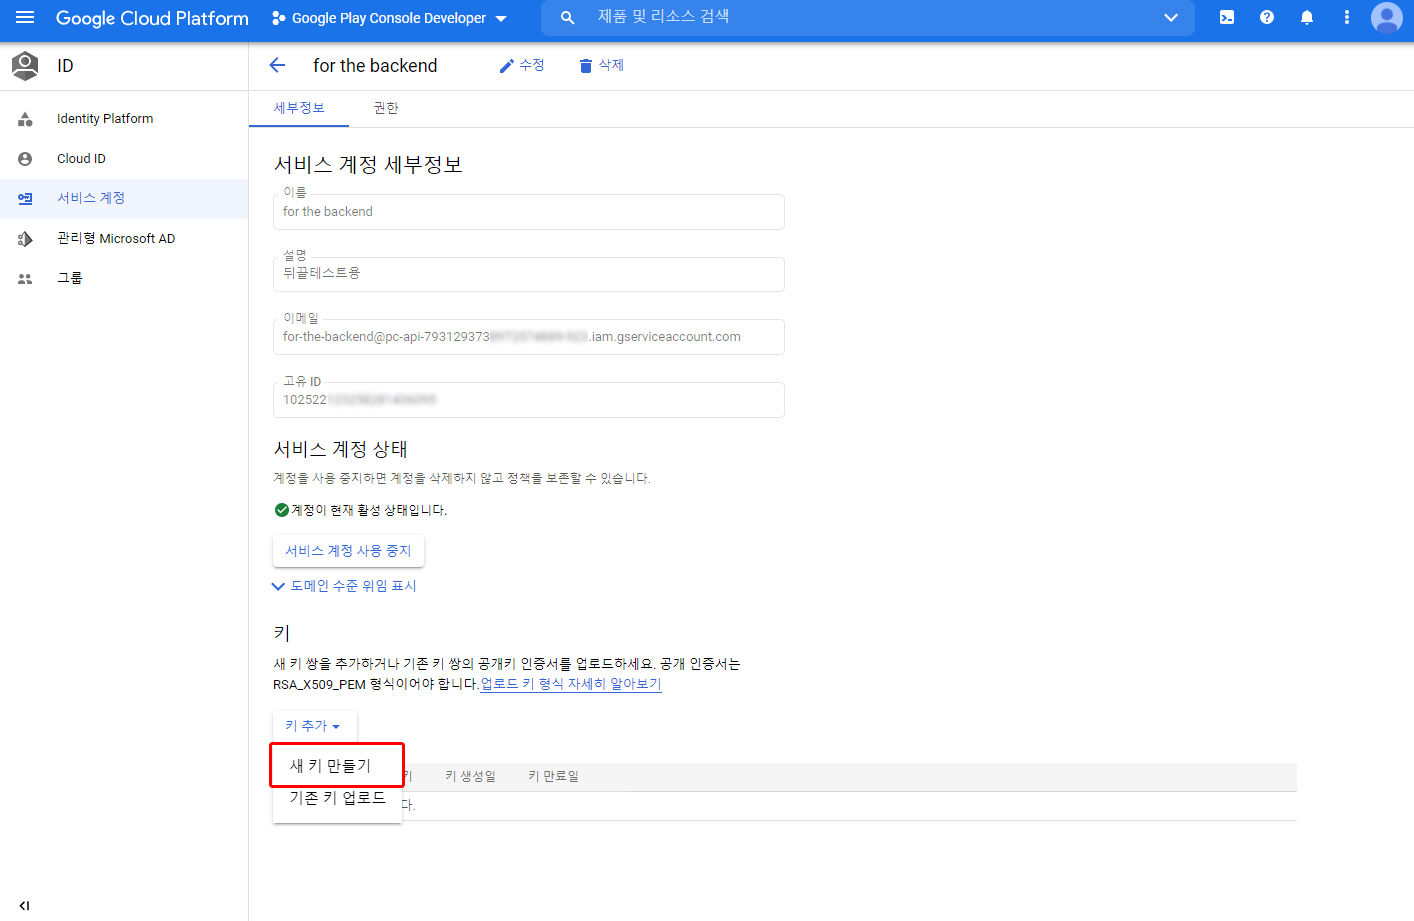
Select JSON as the key type and click Create. After that, the JSON is downloaded automatically.
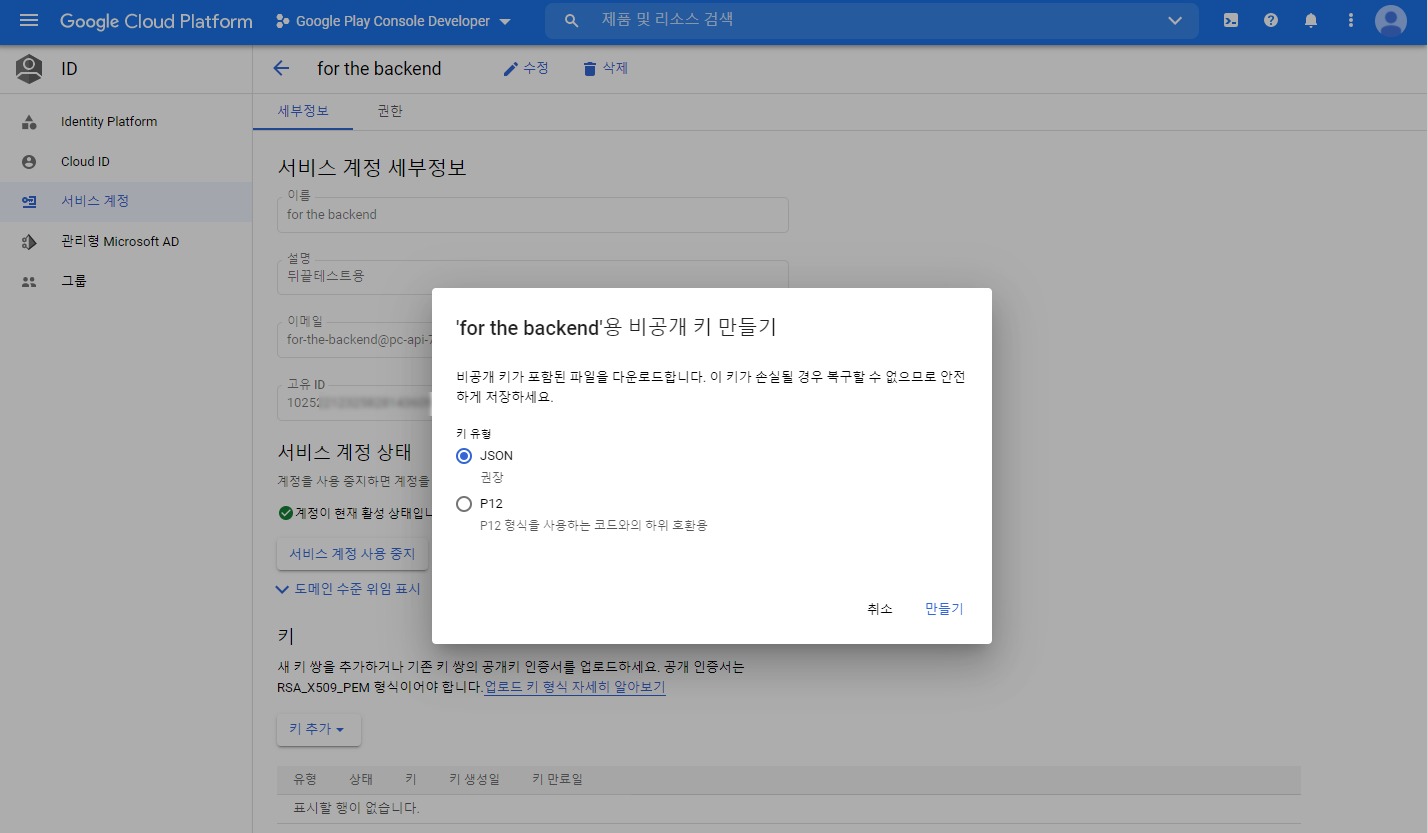
Note on JWTJWT is registered normally after 24 - 36 hours of creation.
4. Apply in BACKND Console
Register the downloaded JWT file in BACKND Console > Store Settings.
Grant access to the service account
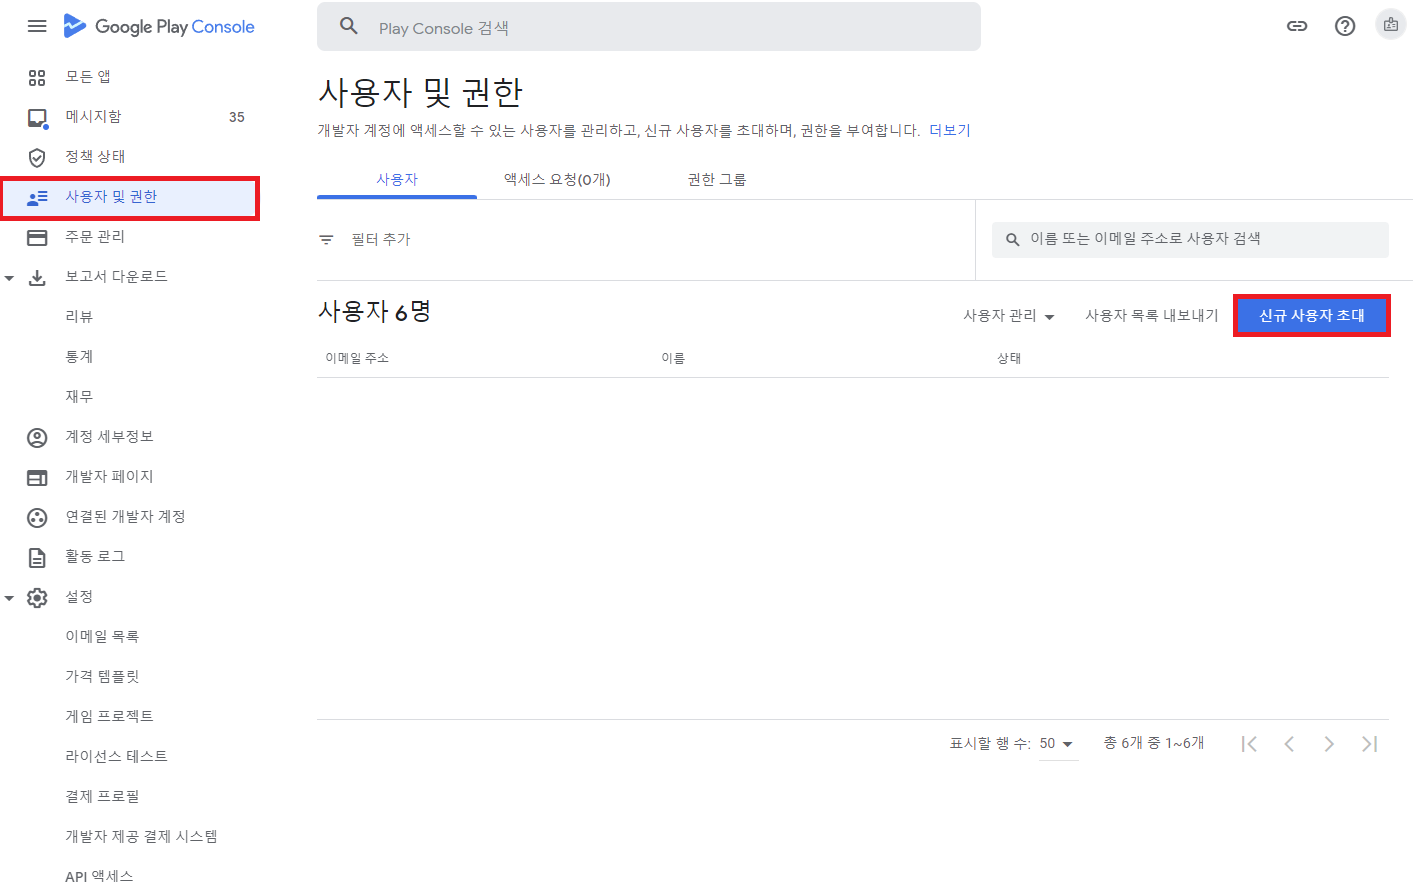
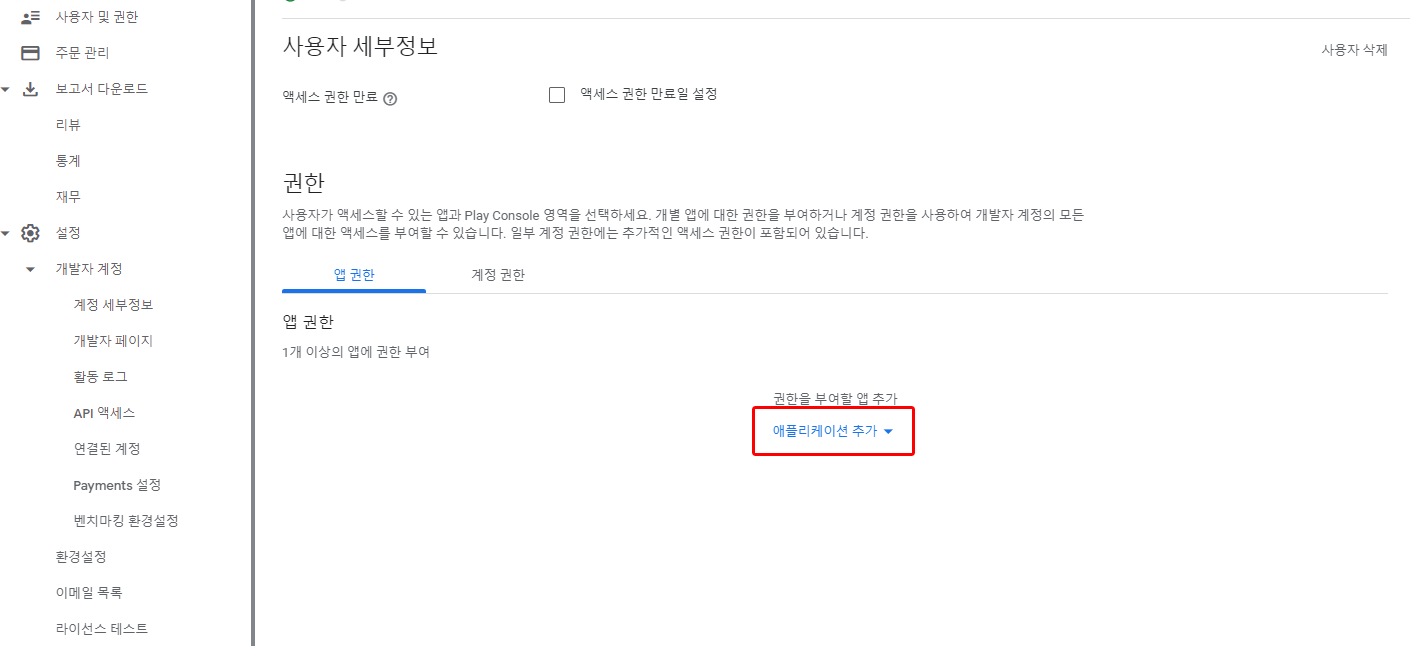
Click Users and Permissions in the Google Play Console sidebar menu.
Click Invite New Users at the top right.
Enter the service account that you created in the email address field.
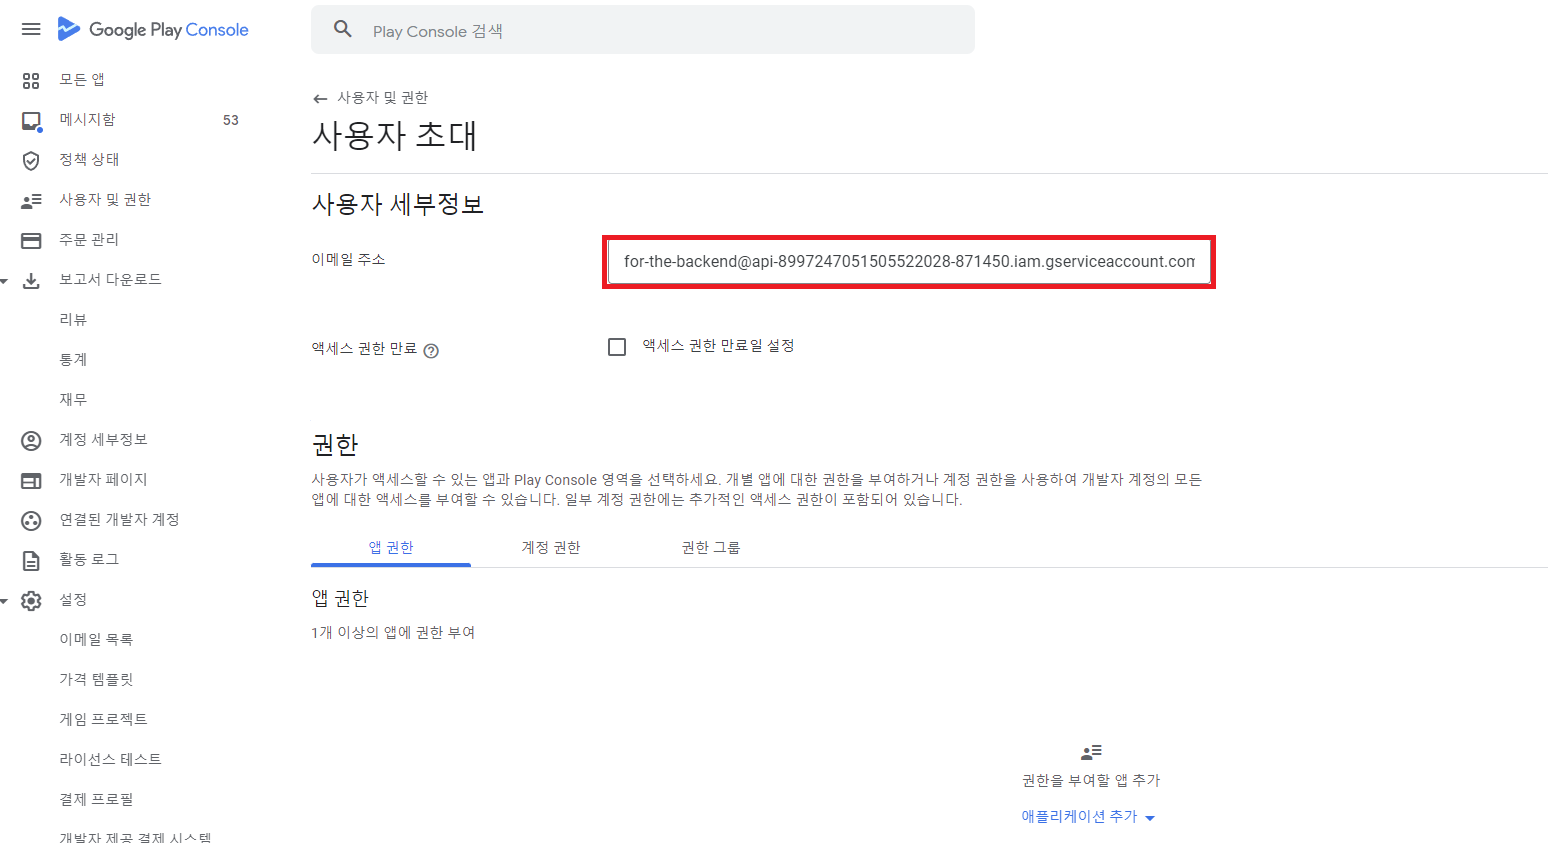
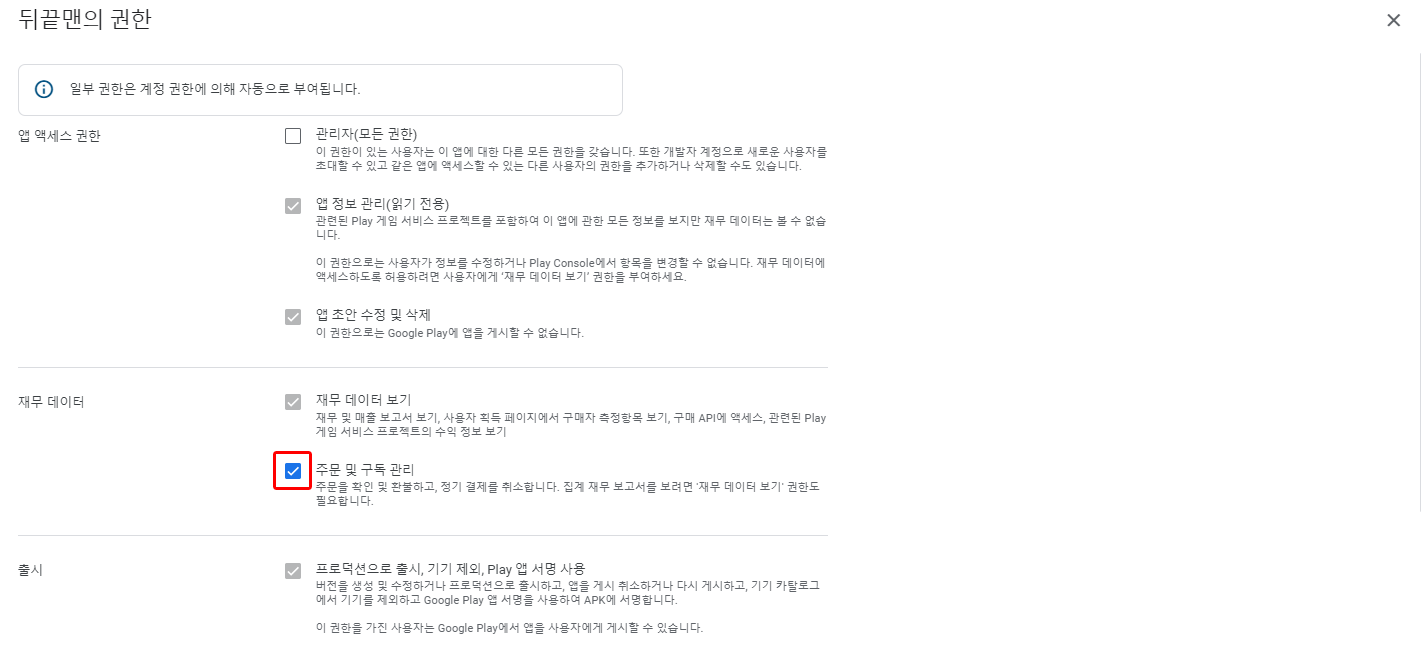
- In Account permissions, check View app information and download bulk reports(read only) and View financial data, orders and cancellation survey responses.

- Add the application registered to the console in App permissions, and check Manage orders and subscriptions in App permissions.
Report storage bucket URL
Go to Google Console > Download reports > Financial and click Copy Cloud Storage URI located to the right of Earnings reports or Estimated sales reports to copy the report storage bucket URL.
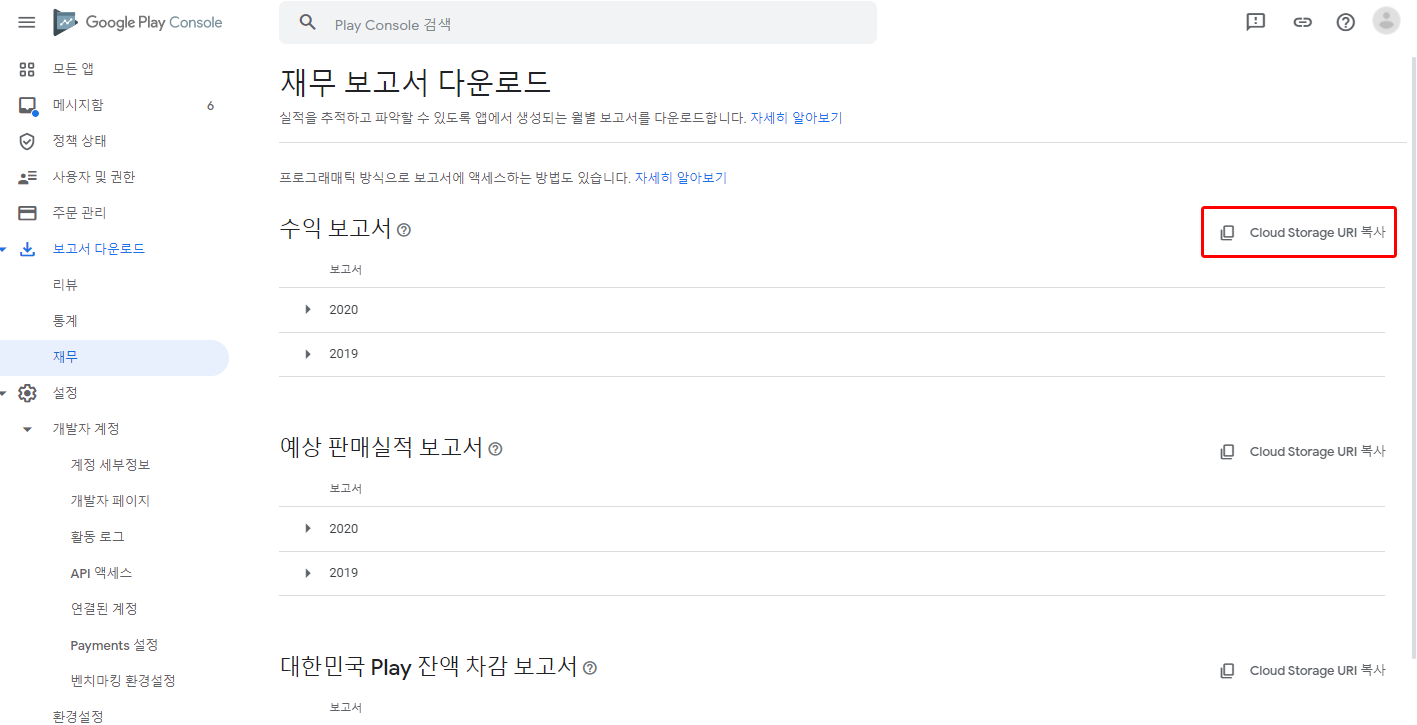
Copy pubsite_prod_xxxxxxxxxxxx or pubsite_prod_rev_xxxxxxxxxxxx and register it in BACKND Console > Server Settings > Store Information > Google Play > Report Storage Bucket URL.
- At this time, it must be copied without
gs://. - If the bucket URL does not exist, you can check the URL after generating a payment report through an actual payment.
-32522bb0f58855f128963501adb21f18.png)