Project Settings
Activating World Project
1. Access the Console
First, log in to the administrator console.
2. Go to Settings Menu
From the left menu, select Worlds > Settings.
3. Activate Worlds
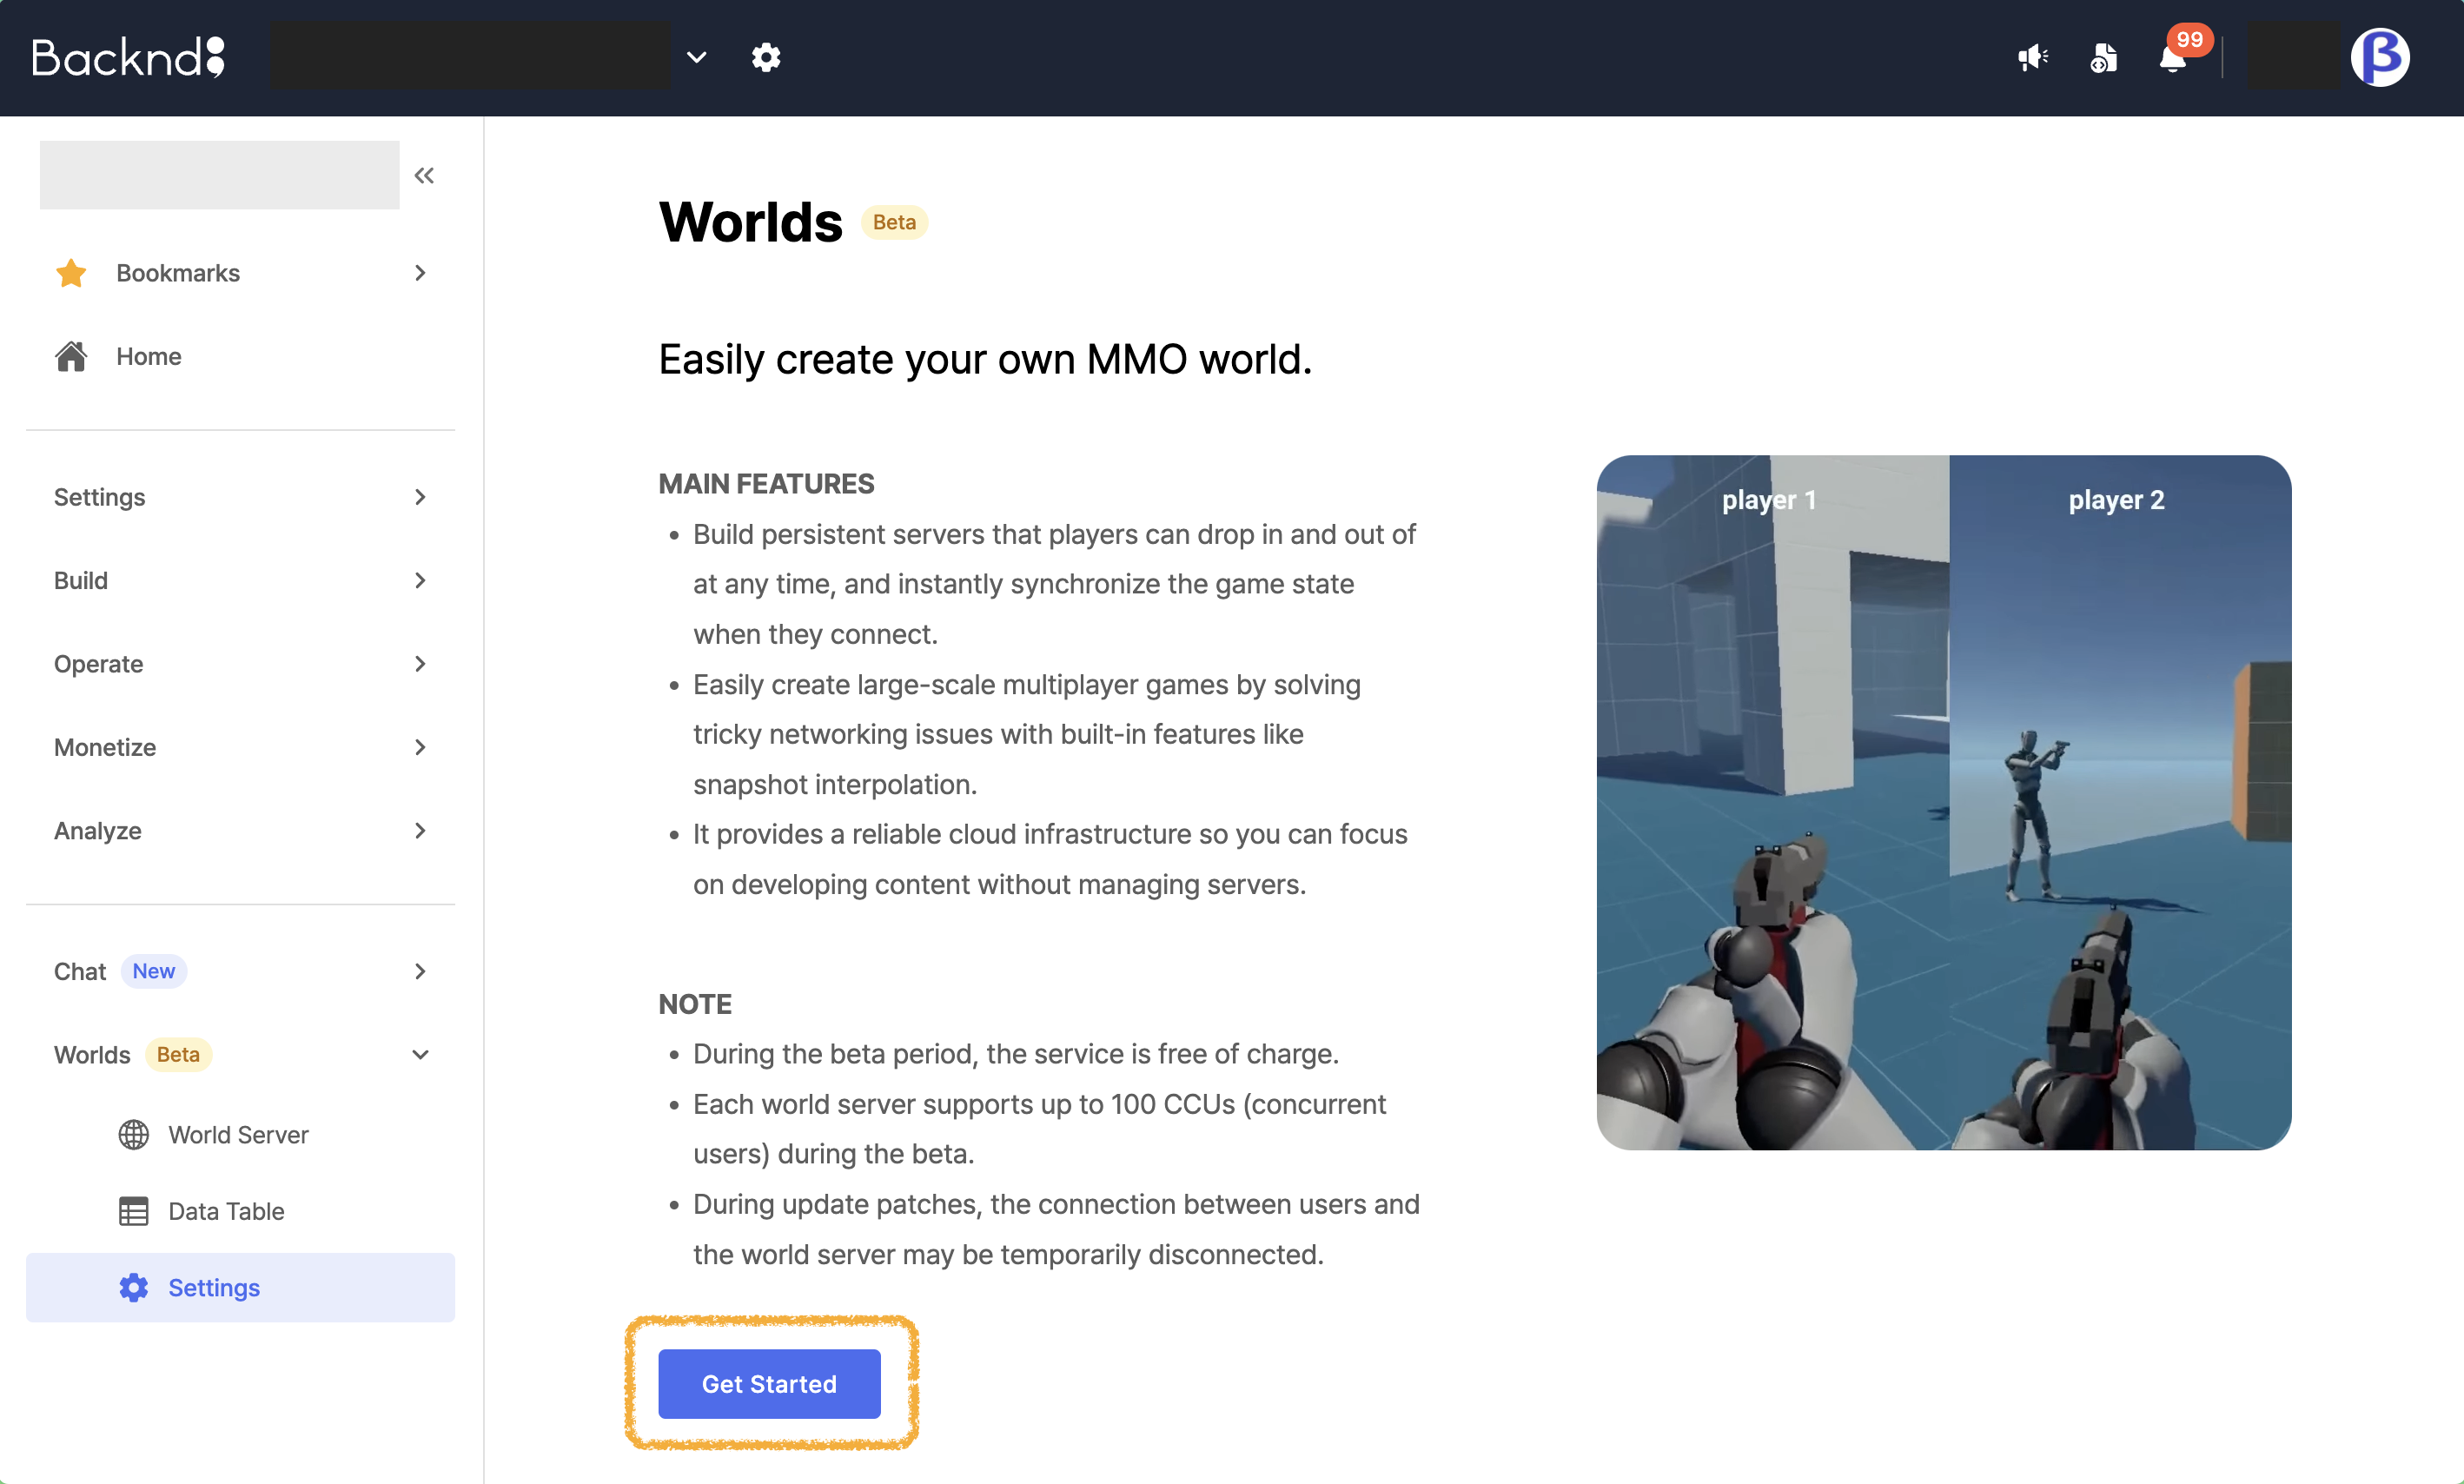
On the settings page, click Get Started to enable Worlds.
Create World Server
1. Start Server Creation
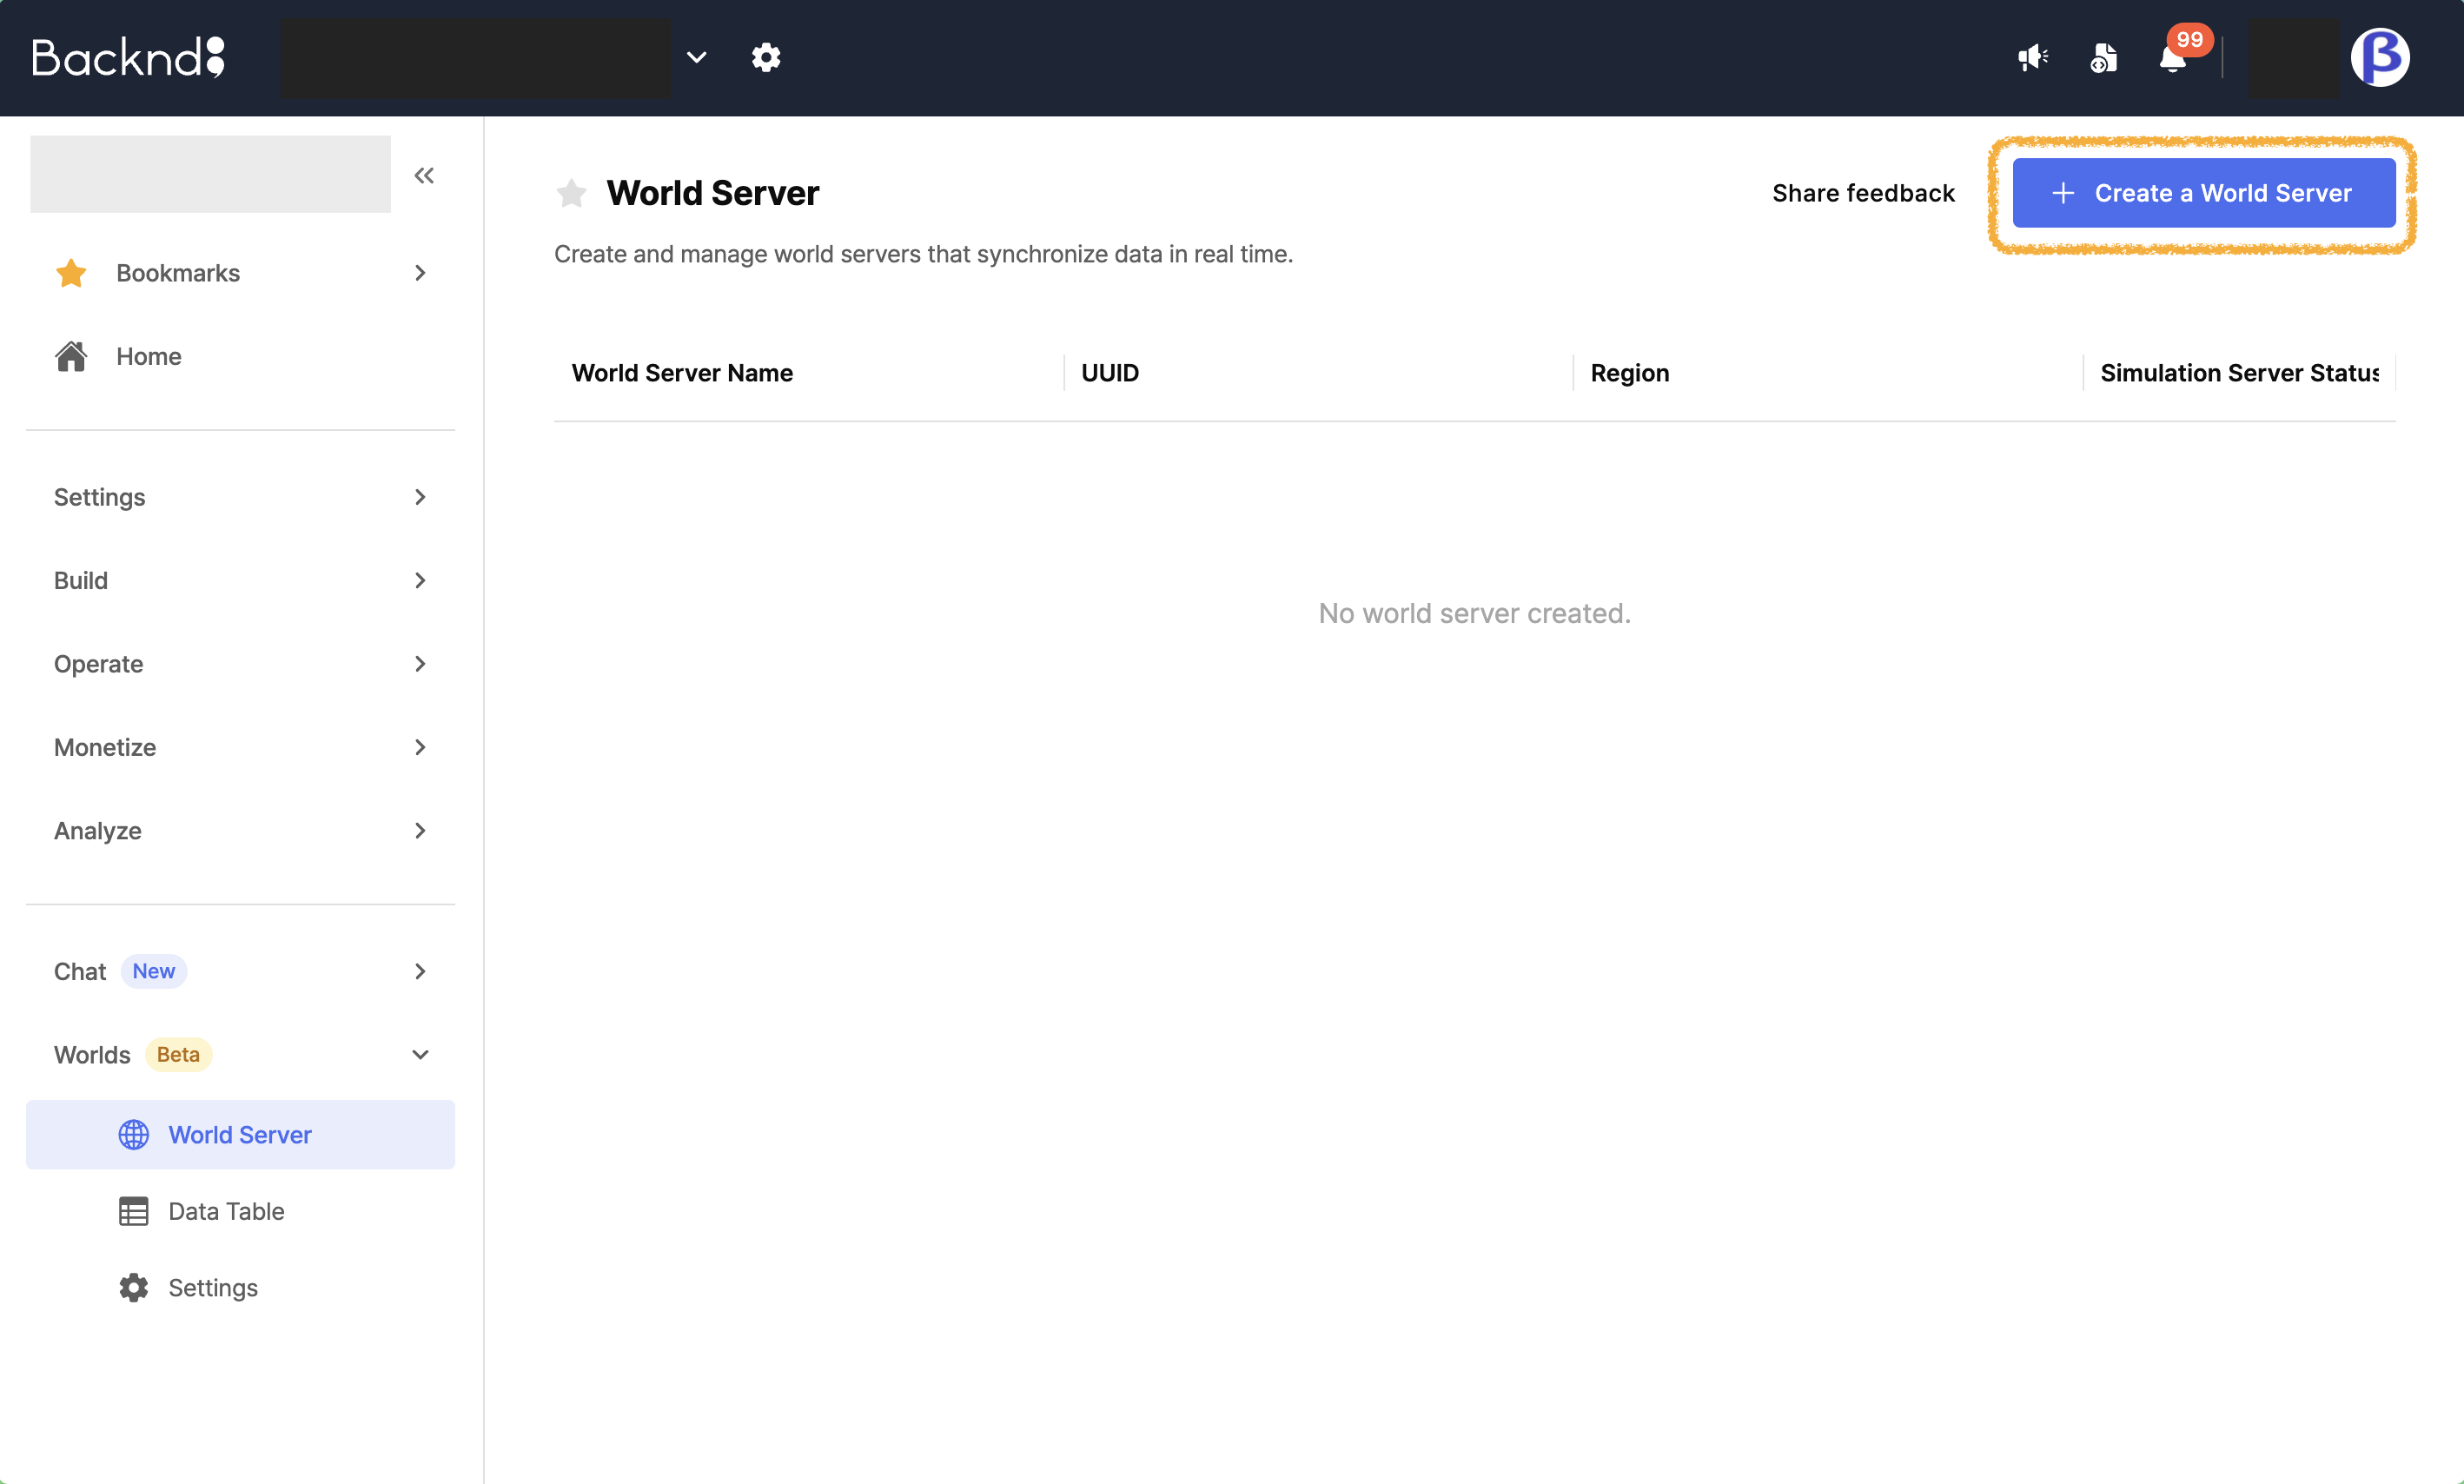
On the settings page, click the Create World Server button.
2. Enter Server Name
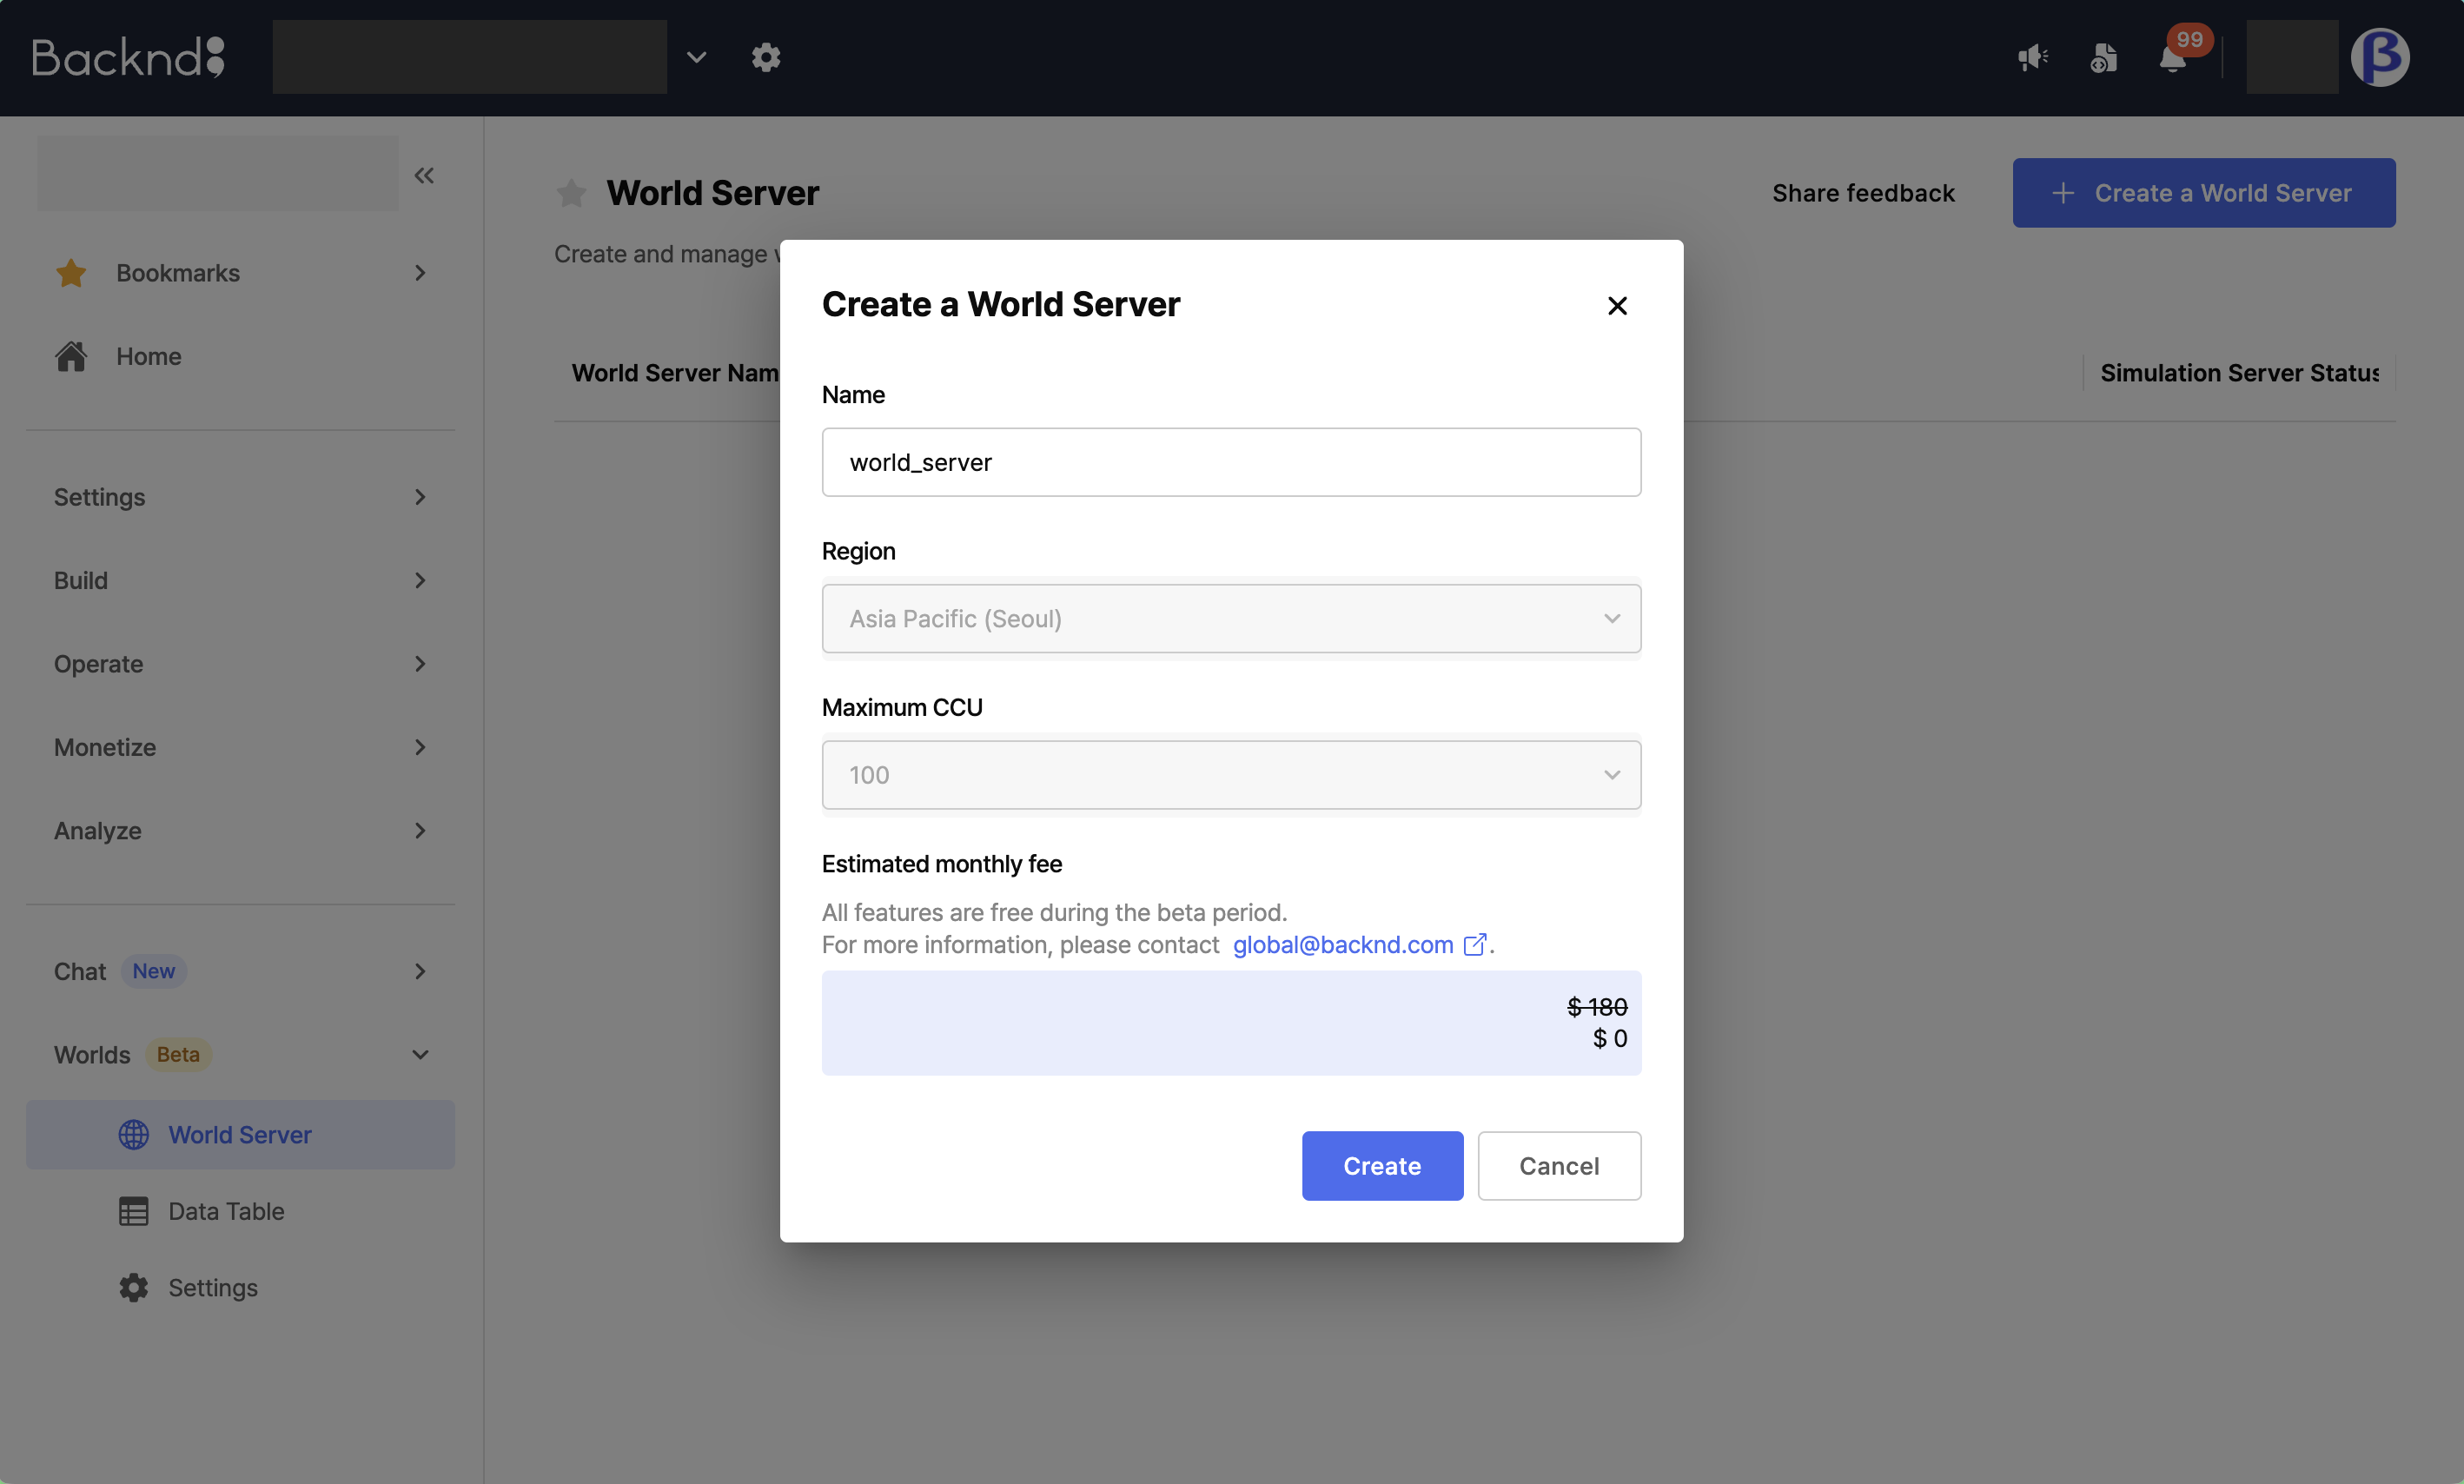
Enter a name for the new world server.
3. Complete Server Creation
After entering the name, click the Create button to complete the server creation.
SDK Installation
For detailed information about SDK installation, refer to the SDK Installation document.
Initial SDK Setup
1. Access the Console
Log in to the administrator console.
2. Go to Settings Menu
From the left menu, select Worlds > Settings.
3. Set Client App ID
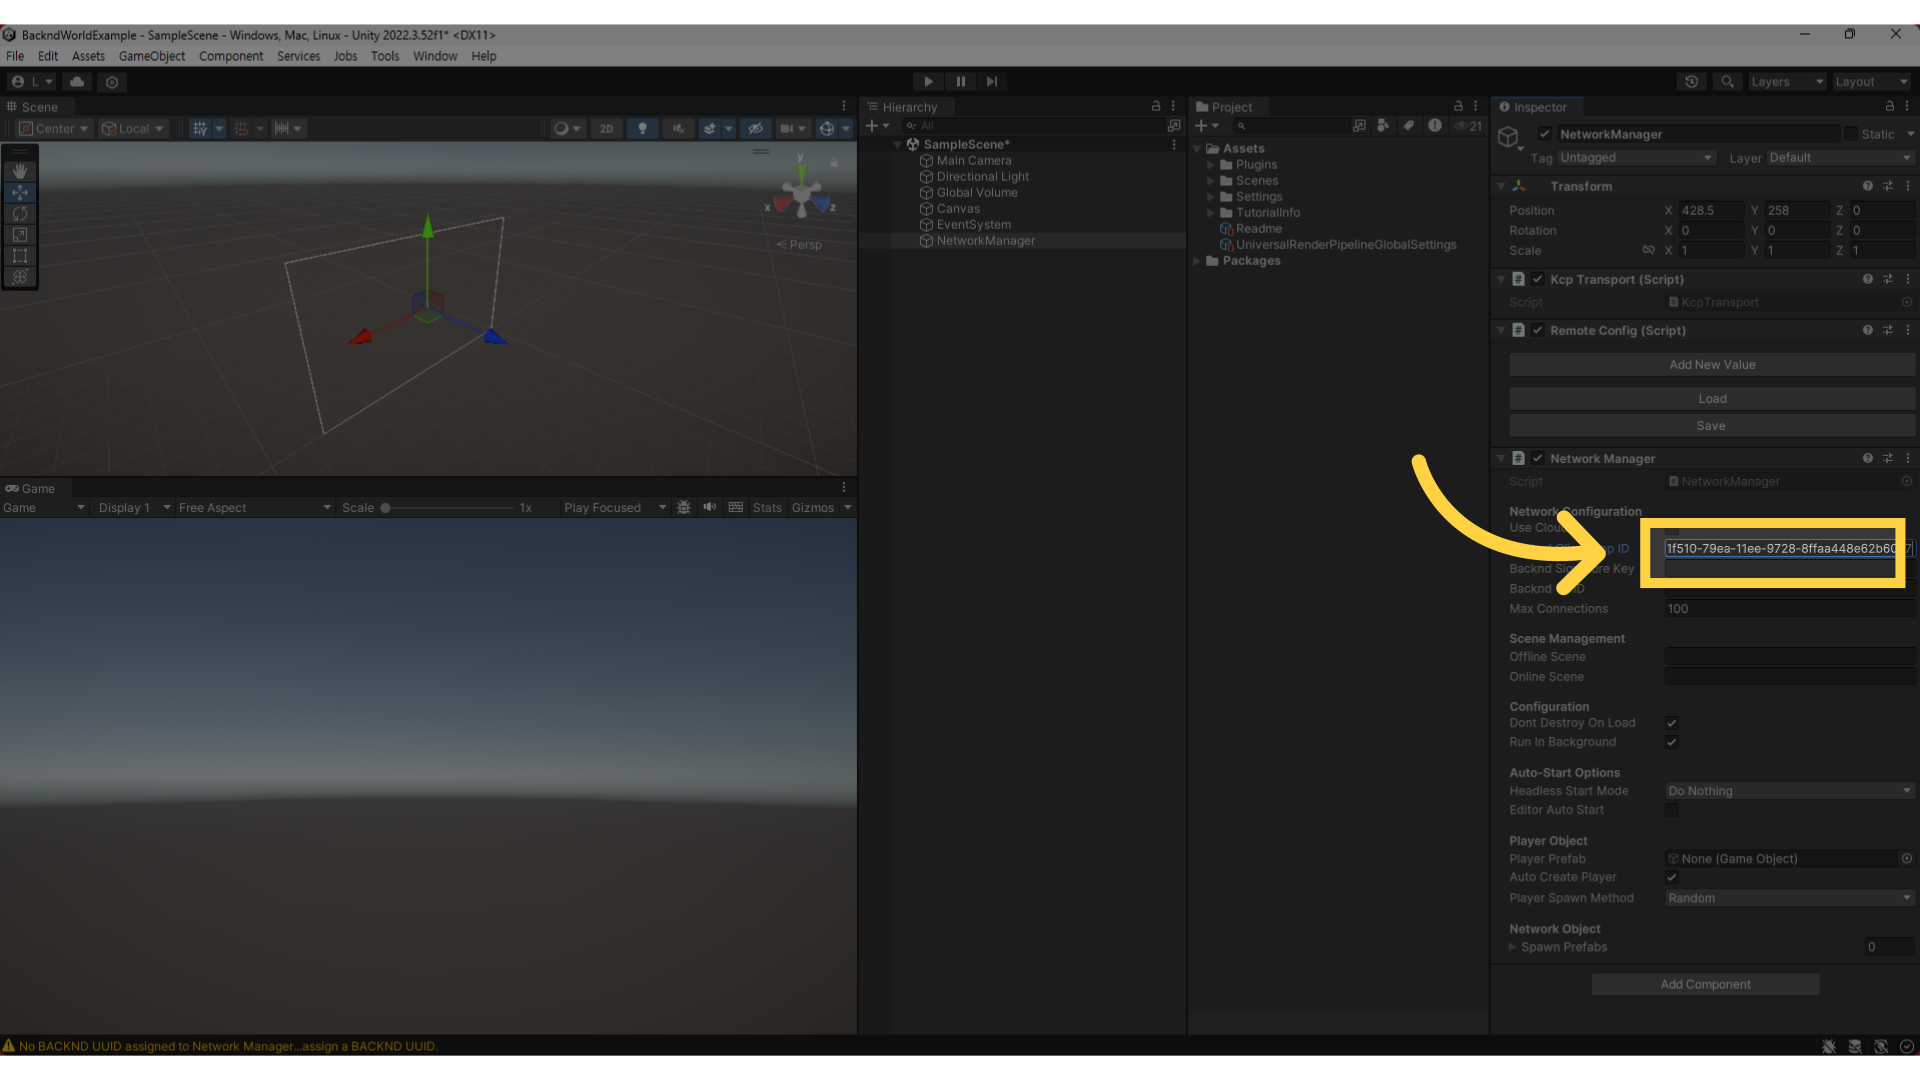
On the settings page, copy the Client App ID.
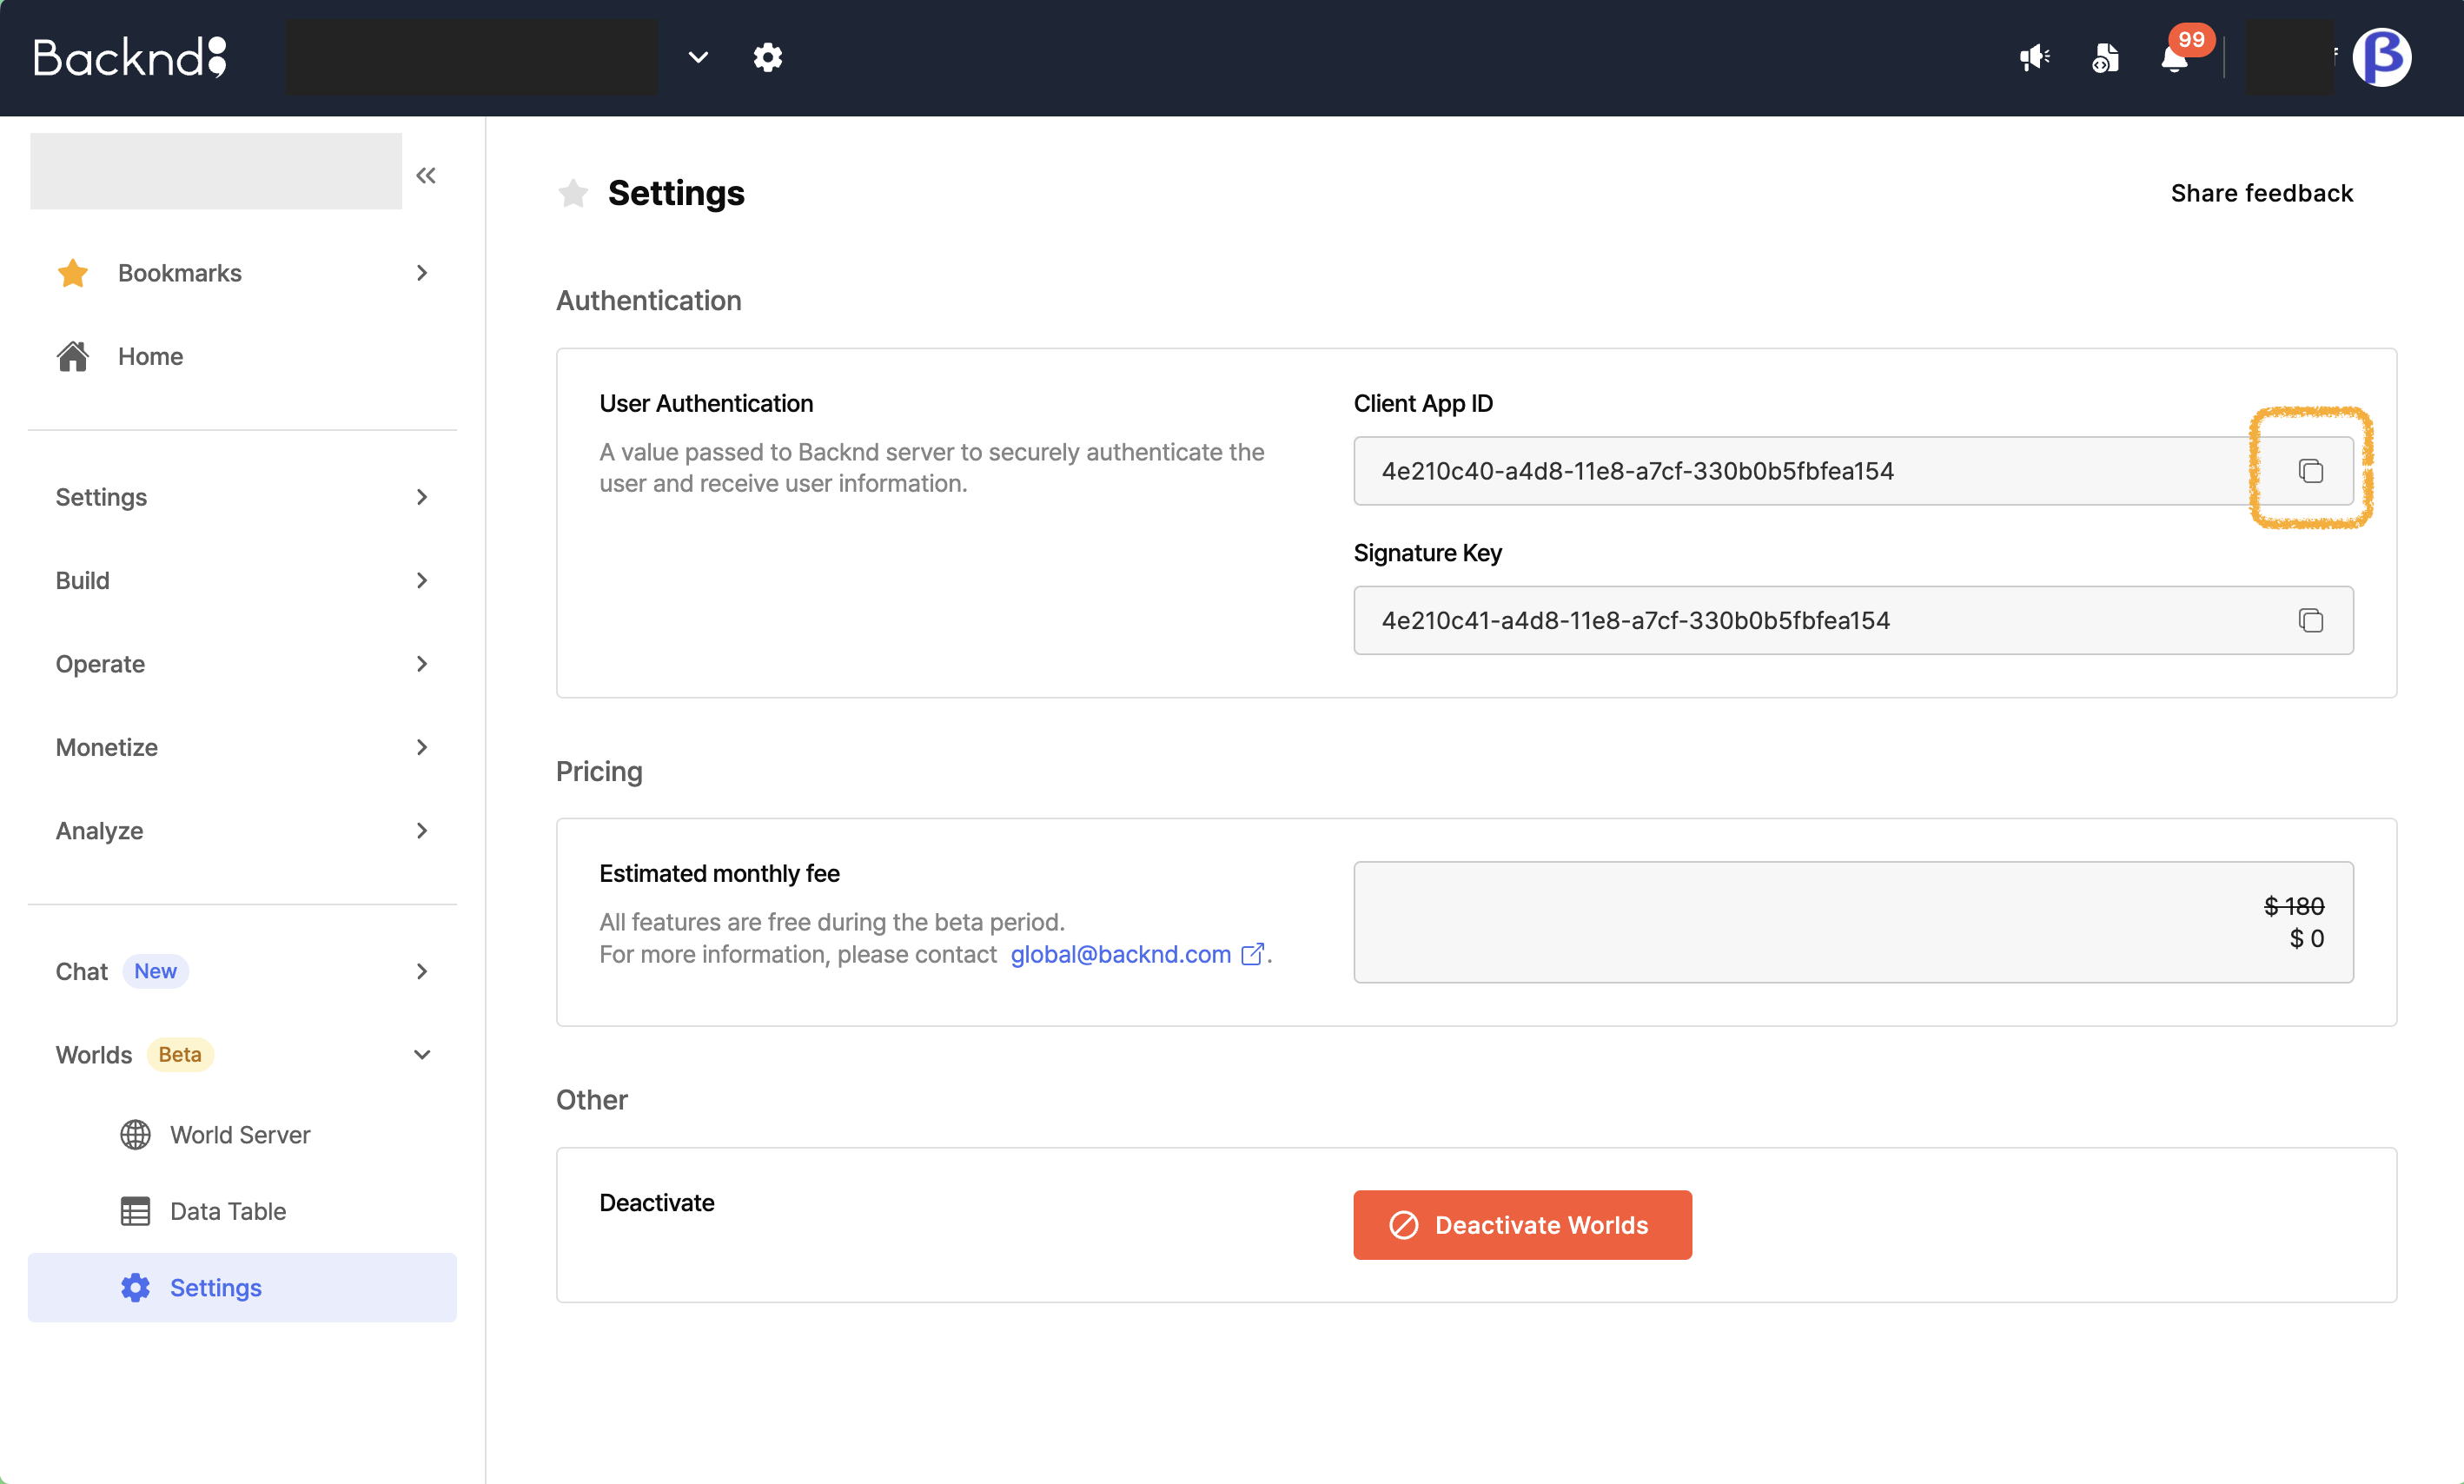
In Unity's NetworkManager component, paste the copied value into the Backend Client App ID field.
4) Set Signature Key
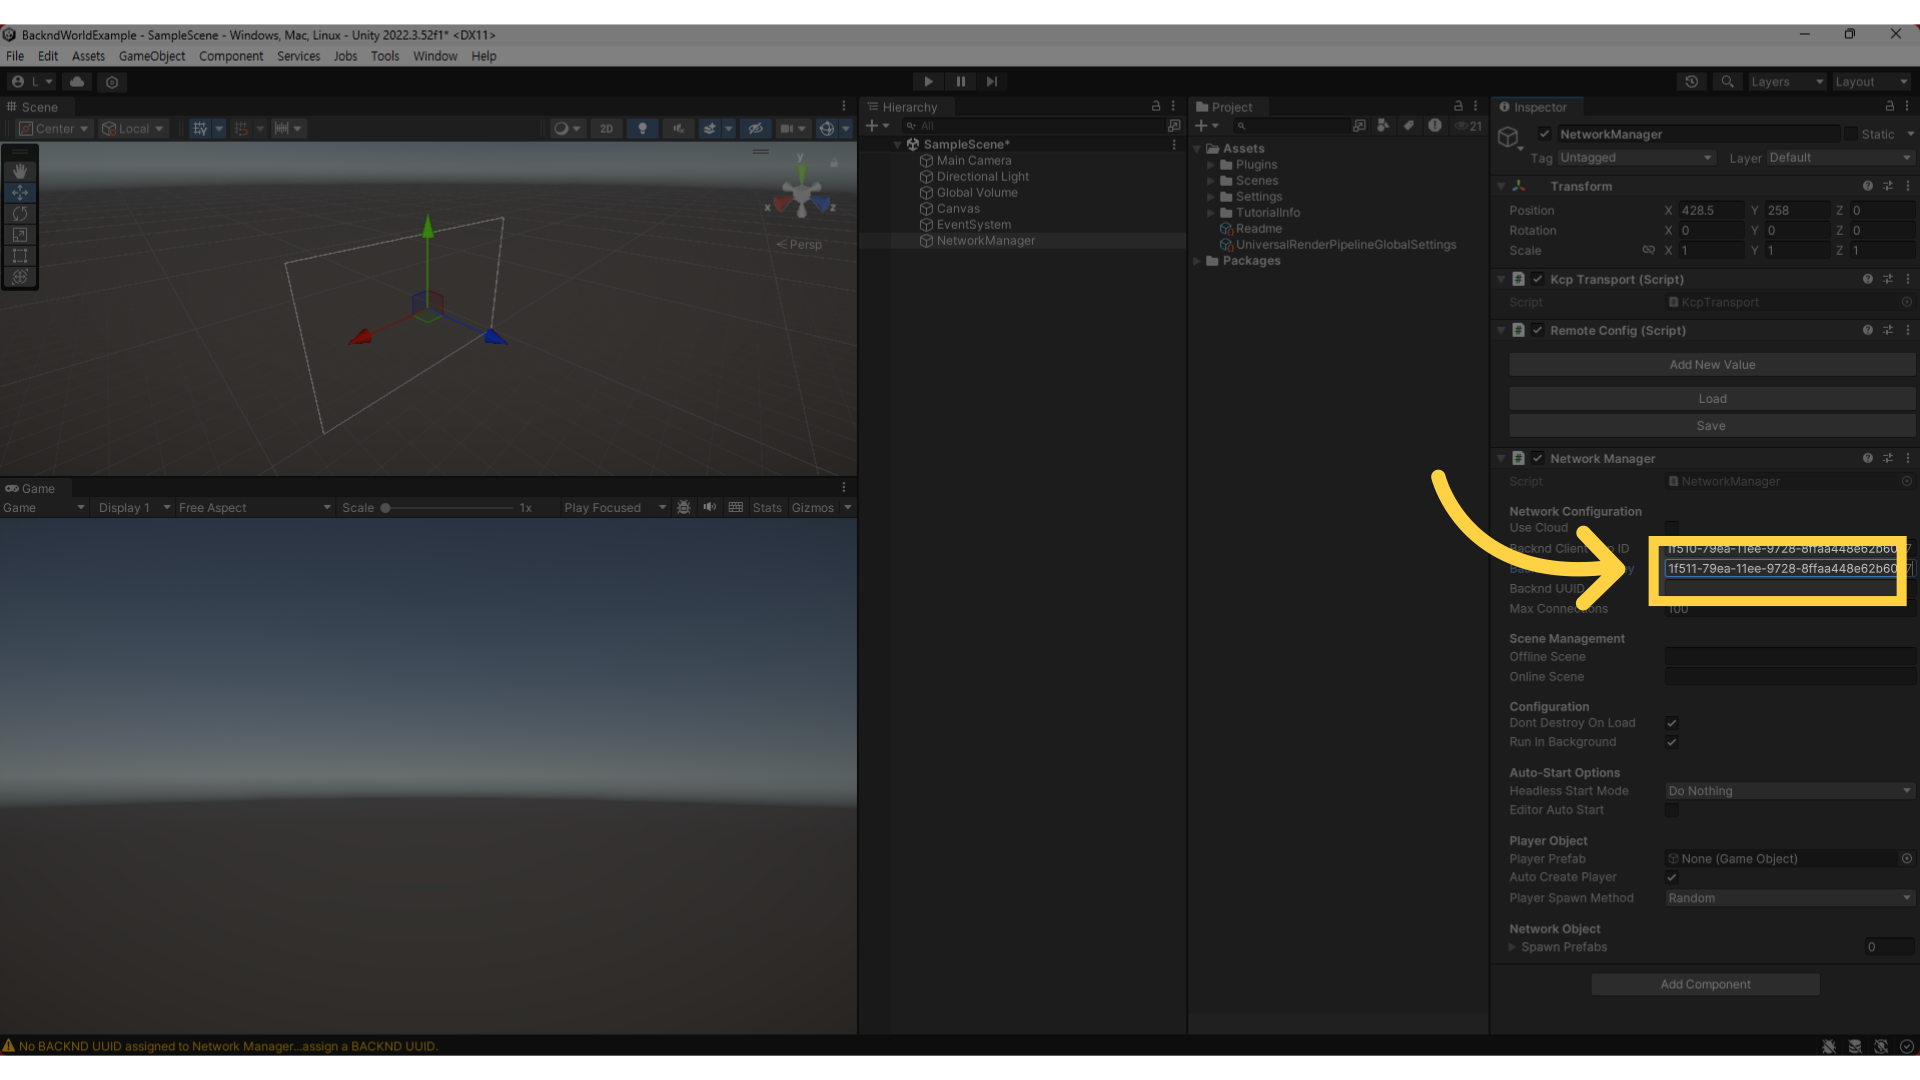
On the settings page, copy the Signature Key.
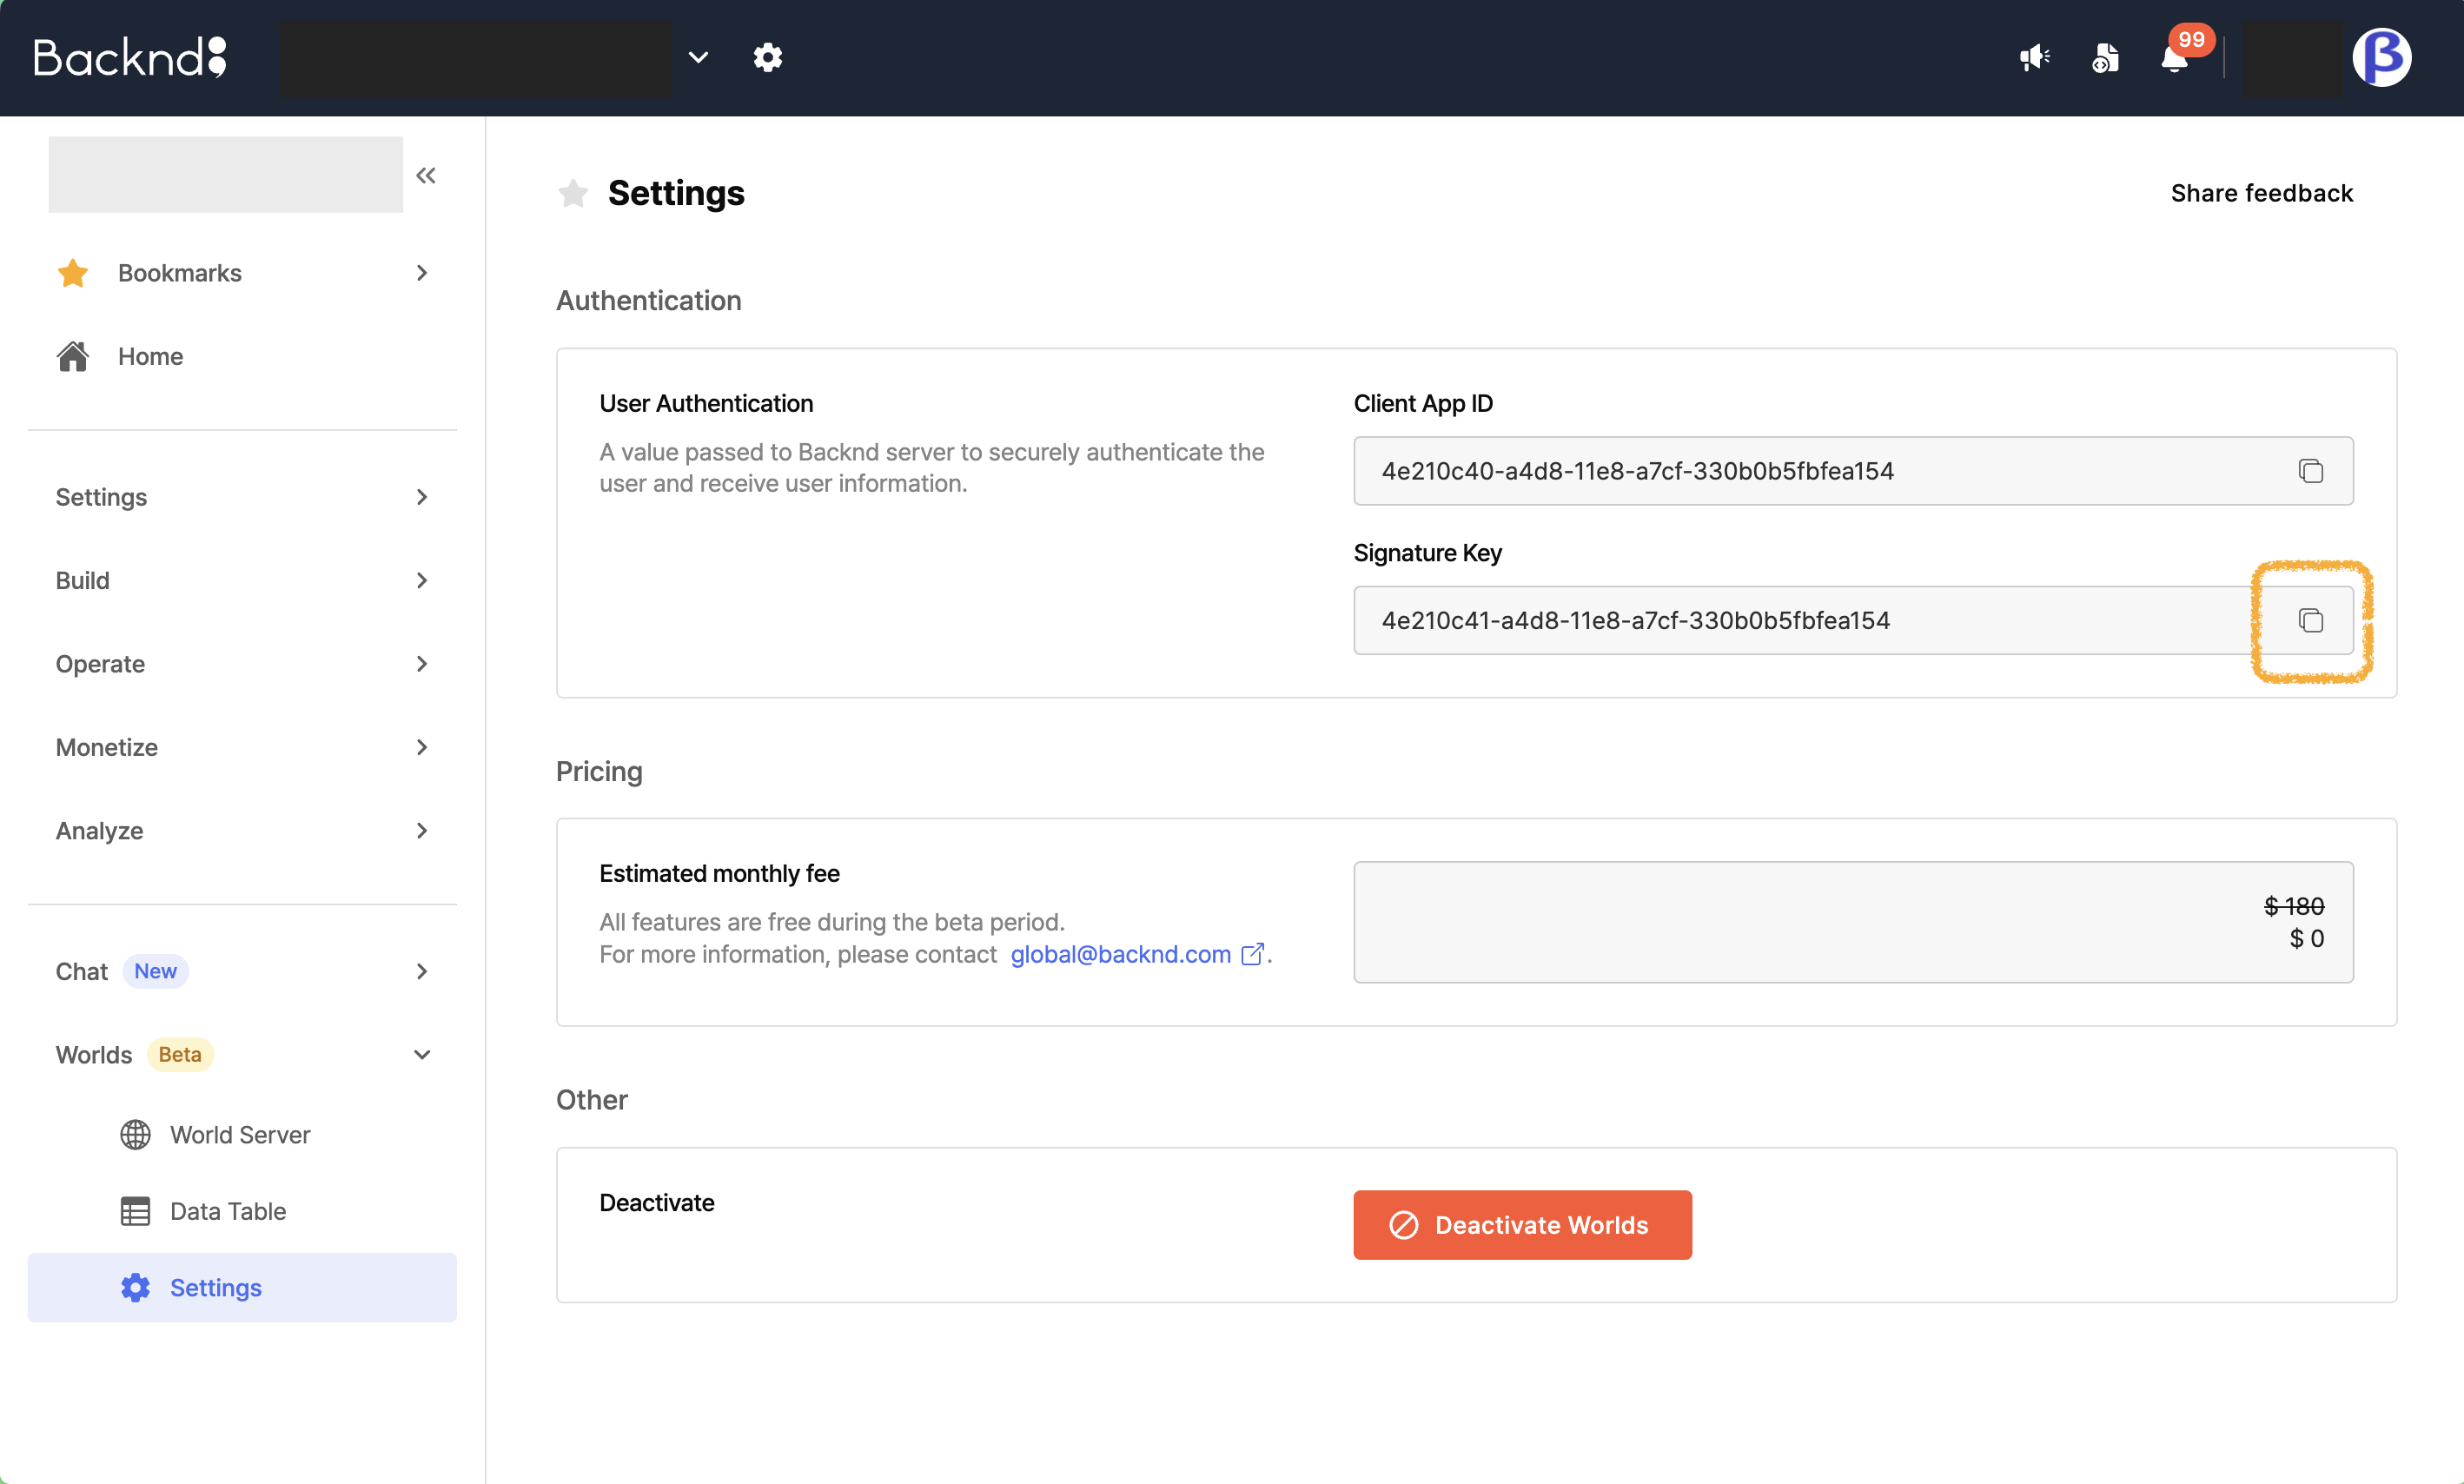
Paste the copied value into the Backend Signature Key field of NetworkManager.
5) Set World Server UUID
Copy the UUID of the created world server.
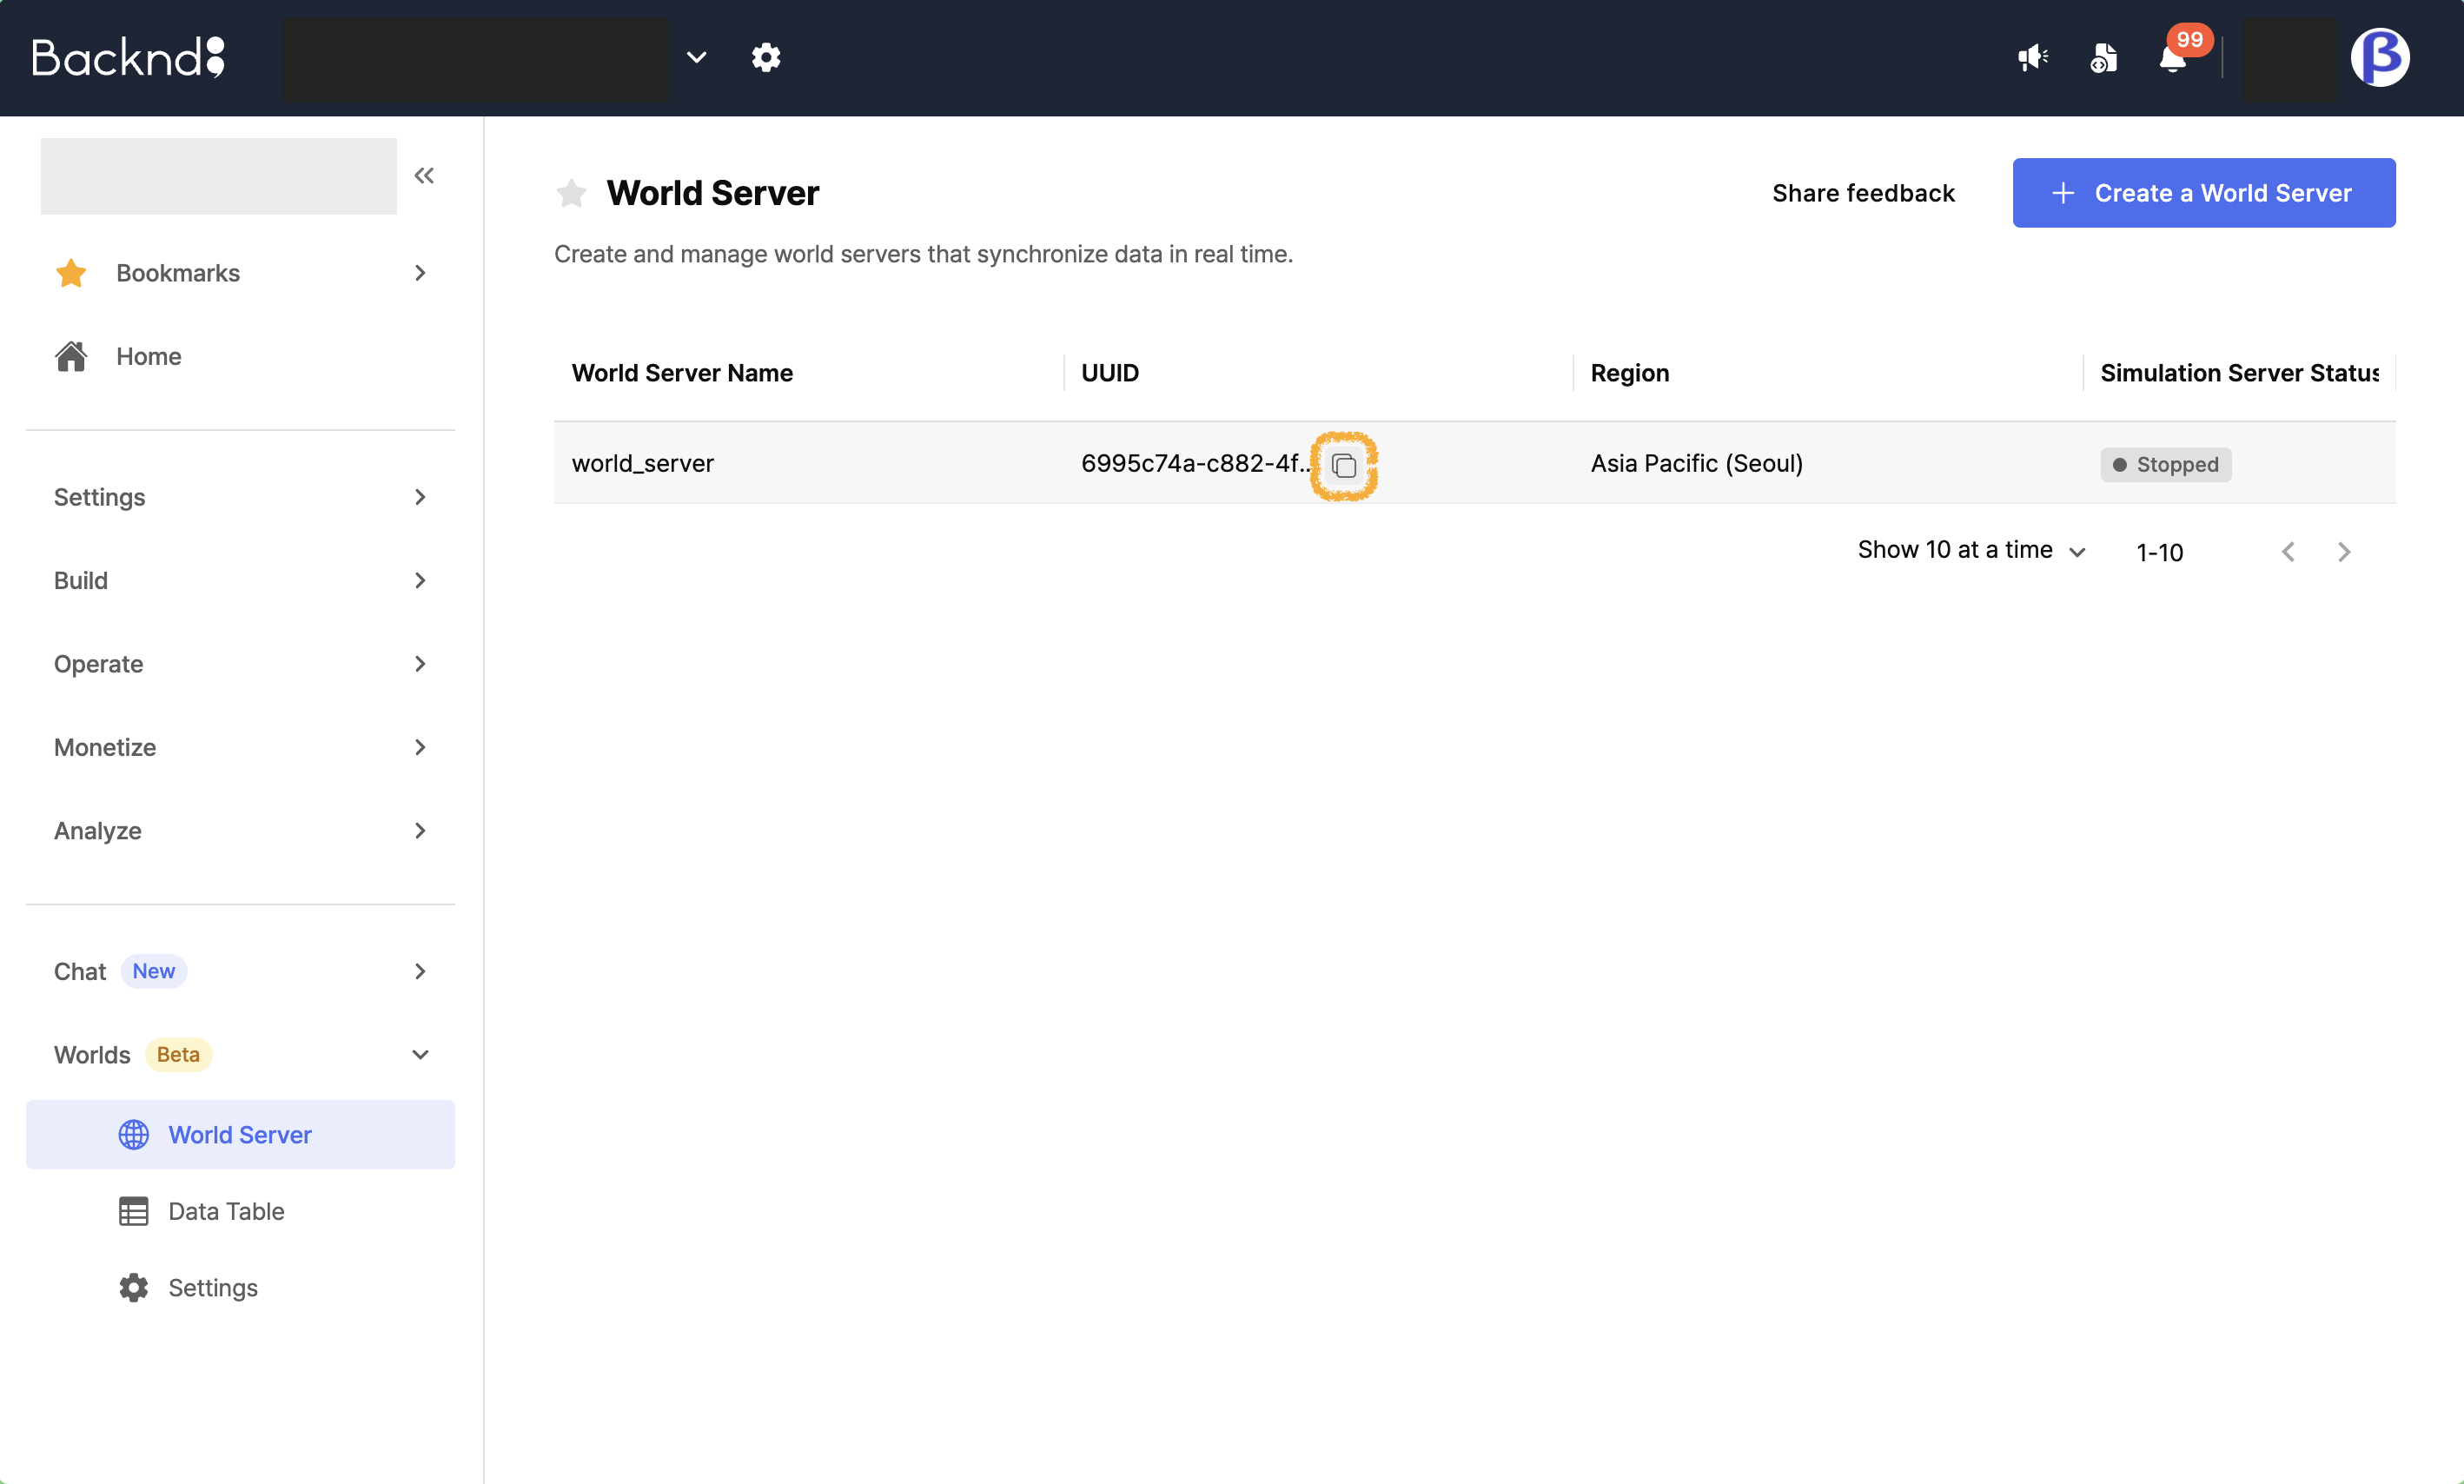
Paste the copied value into the Backend UUID field of NetworkManager.